
Hello everyone. I’m so excited to bring you this new menu to my website. It’s something I’ve been planning for quite a while, and now it’s up and running. I wanted to build a 12th scale dolls house and design all of the decor and furniture etc to go inside of it. Well I’ve made a start downstairs and decorated the kitchen. I’ll show you how I painted the walls. Take a look at the next picture.
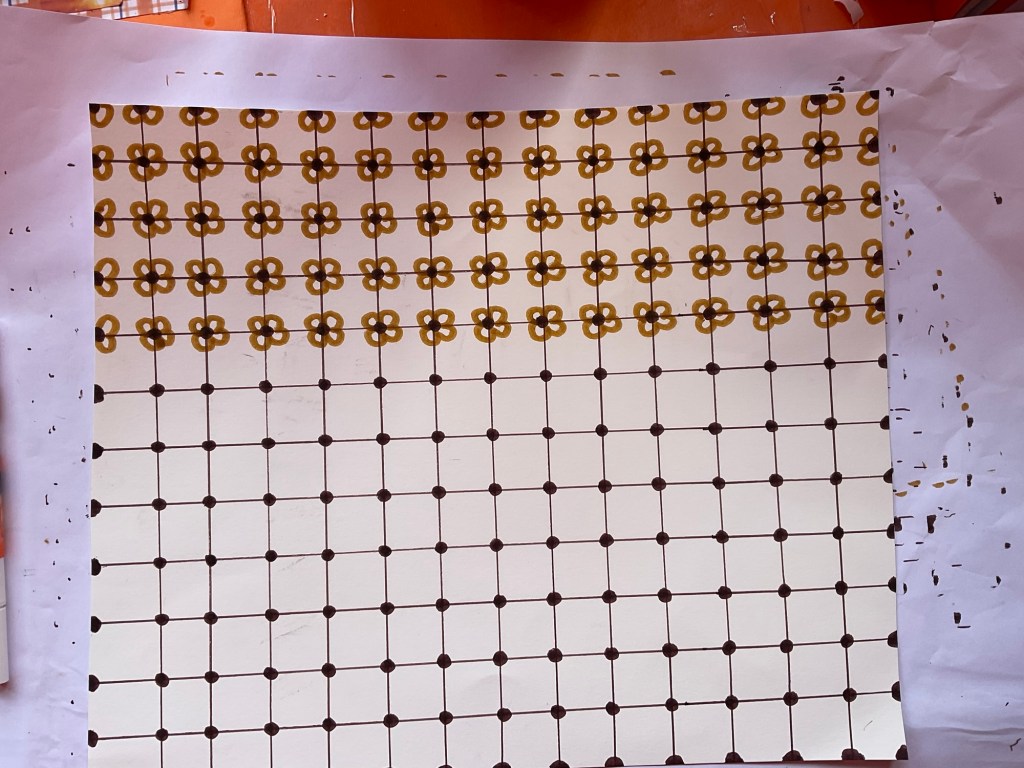
I wanted tiled walls for the kitchen. I cut down a sheet of cartridge paper and marked out the pattern in pencil. Then I used alcohol markers to paint the pattern. I did this for all three walls. – Now have a look at how each room in my dolls house starts out.
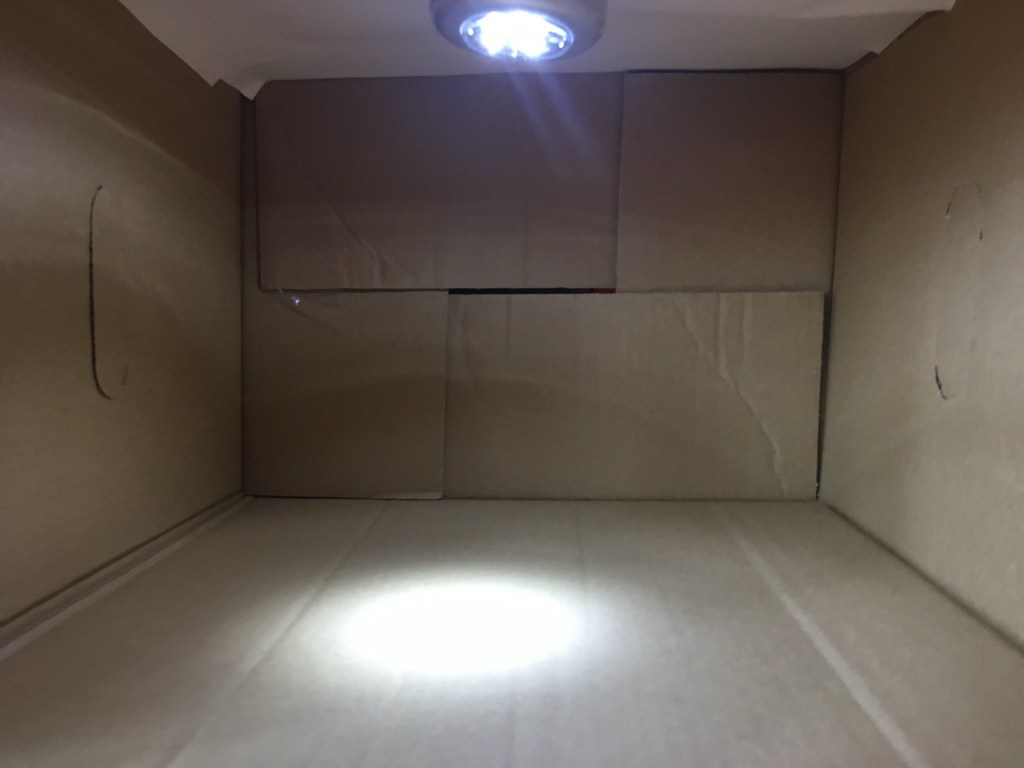
Each room in my dolls house starts as an empty cardboard box. I’ve added the light to make it easier to see, as it’s rather dark inside with no lighting. So far, I have six boxes, but I’m planning to buy another pack so that I can add two more rooms in the attic. I currently have the flaps off of one of the ends to make an open space at the front. – come and see the flooring.
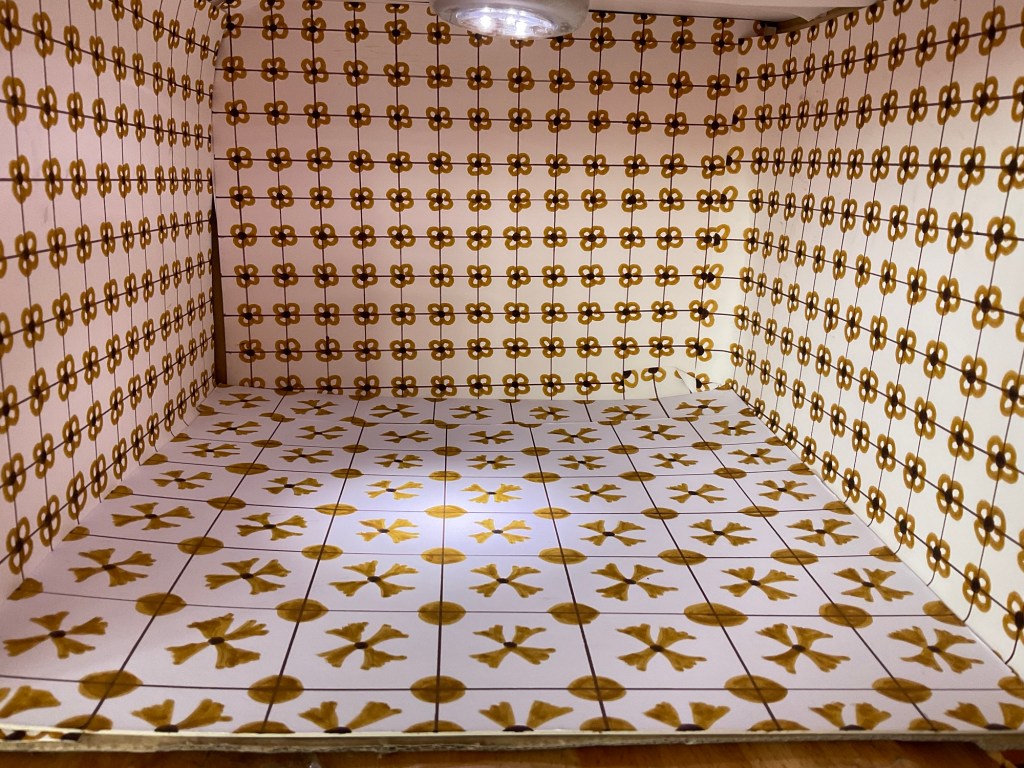
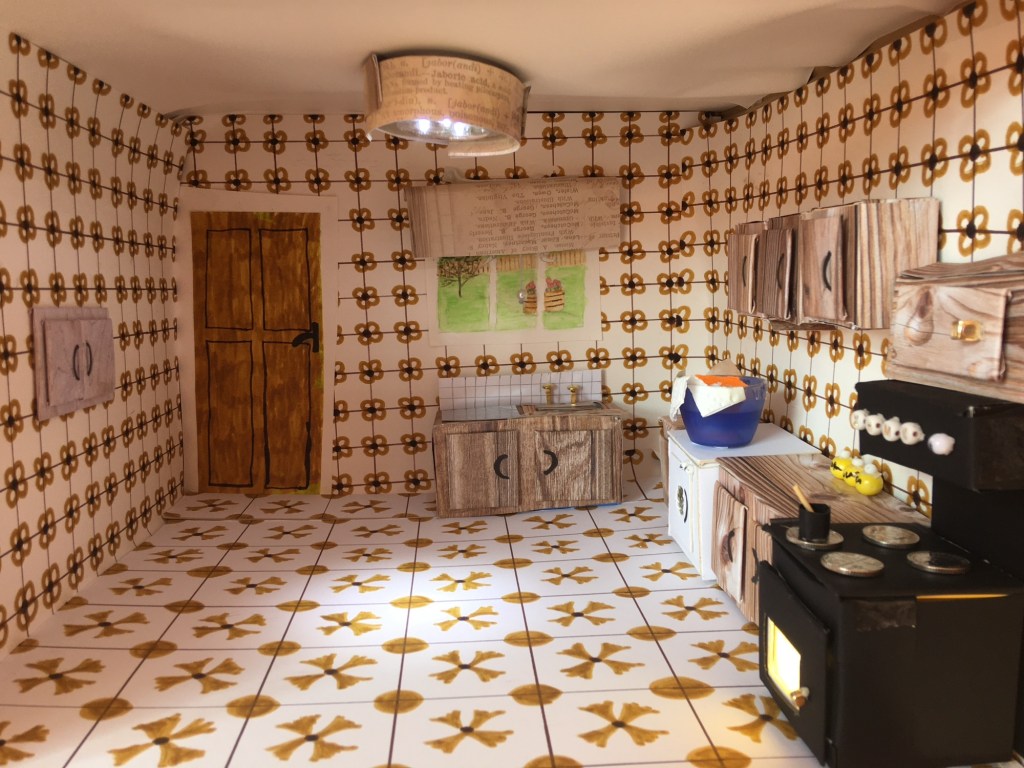
Once the floor is added, it really starts to look like a room. I used white mount board for the floor and painted the pattern with alcohol markers, as I did for the walls. This took quite a long time, but it was very relaxing to do. Adding the window, window blind, door and serving hatch, and light fixture really made the room come to life.
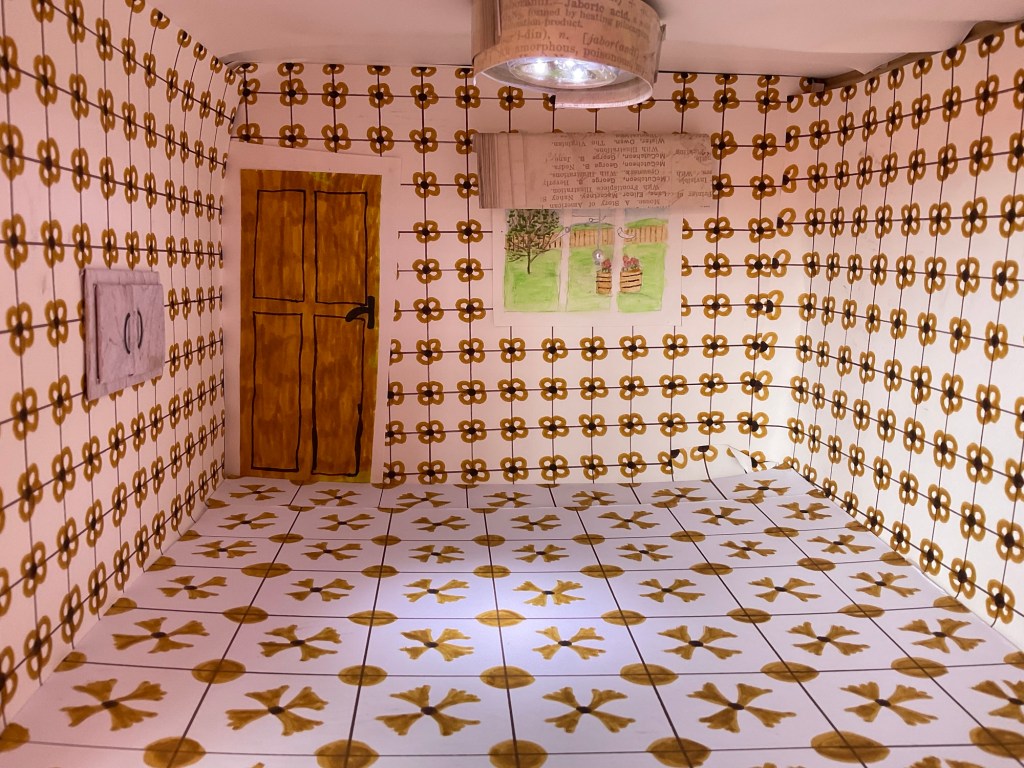
The window is a piece of cartridge paper, and I painted the view with watercolour pencils. The window blind is a piece of patterned paper which I rolled up part of the way and added a small piece of twine with a white bead at the end for the pulley. The door is painted with alcohol markers and stuck onto a piece of white card to create the door frame. The light shade is made from the same patterned paper as the window blind, so that they coordinate. Finally I added a serving hatch to go through to the dining room. This is a piece of mount board covered with wood effect paper with squares of covered board for the doors. I drew on the handles with a black sharpie pen and added subtle shadows with a pencil. I’ve made another serving hatch exactly the same to go on the side of the dining room, once it’s made.
I’ve enjoyed the start of my new adventure and tomorrow, I’ll start to make the furniture and fixtures, once I have some of them in place, I’ll show you what they look like inside of my new dolls house kitchen.
If you are interested in this project, please follow my website to be updated on new developments. 🌅
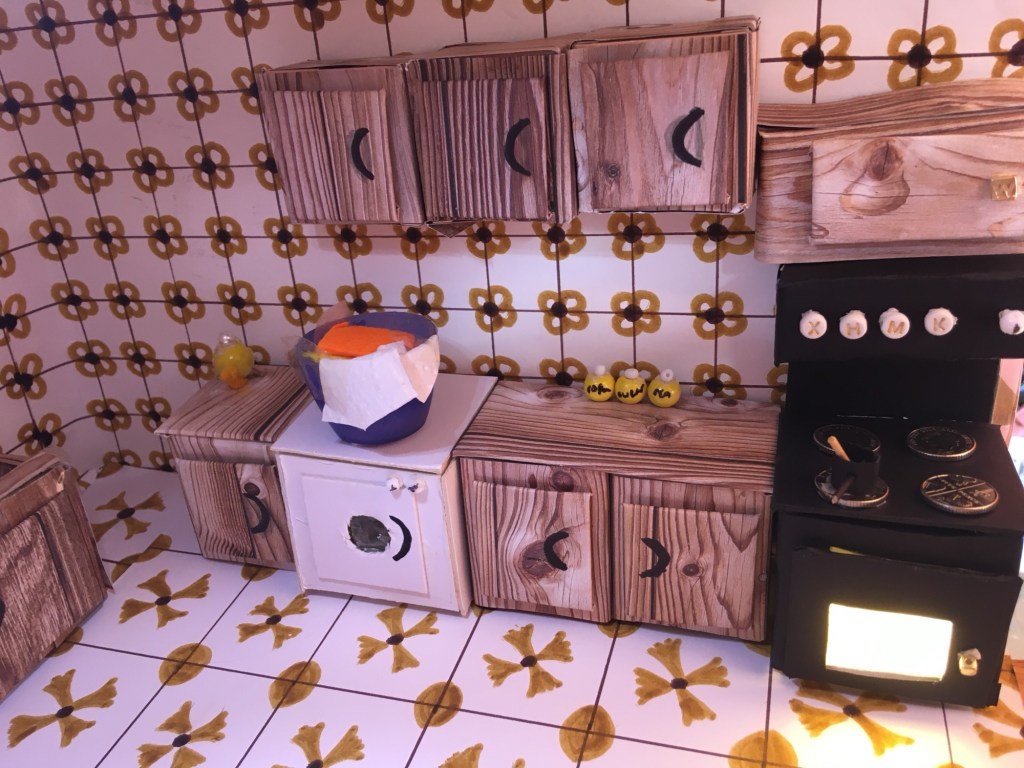
I’ve been working on the kitchen in my dolls house today. I’ve finished the cupboards, including the ones on the wall above the workstation. I’ve added a washing machine and laundry basket. The basket is actually a lid from an old deodorant and I thought it would make a great laundry basket. I folded up some scraps of cloth and added them, including draping a couple over the side. The oven was fun to make as I decided to add a light to the main part at the last minute. I managed to hide the wiring behind the tallest part of the oven and I disguised the battery case by making it look like a cupboard. It’s the one directly above the oven. It’s actually quite effective because you turn on the switch at the top and the light comes on at the bottom of the oven. My only challenge now is to stop playing with it. 😆😆😆
I’ll be back once I’ve completed the other wall and made the kitchen table and a couple of chairs. There might be something on the table to look at if it turns out as I’m planning it.
Until next time, have fun and …… HAPPY CRAFTING 🌅

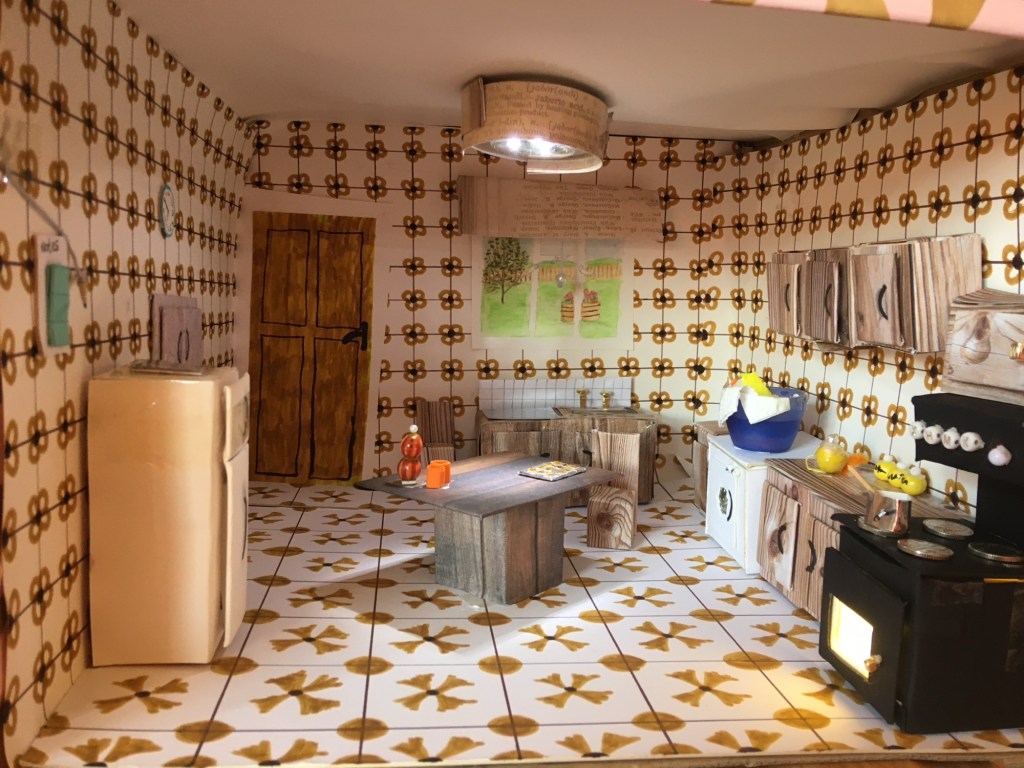
I’ve now completed the kitchen of my dolls house. I’m really pleased with how it’s all worked out, and I’ll let you into my secrets of how I made some of the little features in this room. Come in and have a look around.
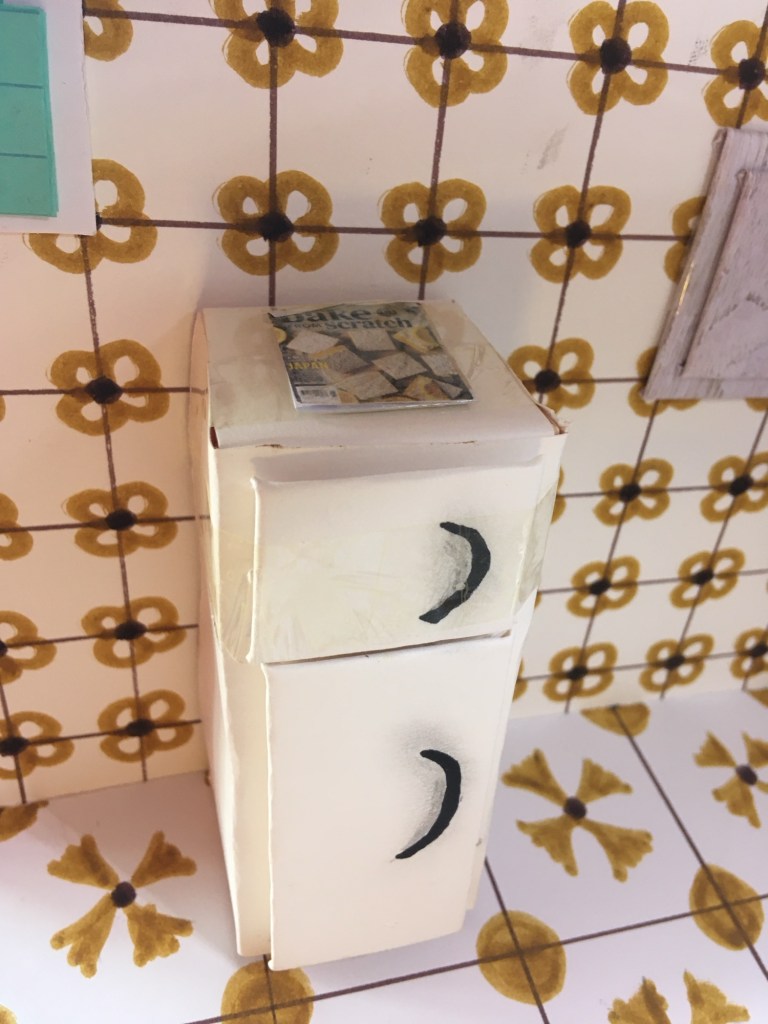
This was quick and simple to make, as I used my covered box technique. The handles are painted on with a black sharpie, and I added some shadows with a pencil to make them look more three dimensional. The magazine on the top of the unit is a photo of the front cover of a real magazine, which I resized, concertina folded and taped into place. I used sticky tape to make the magazine look glossy.
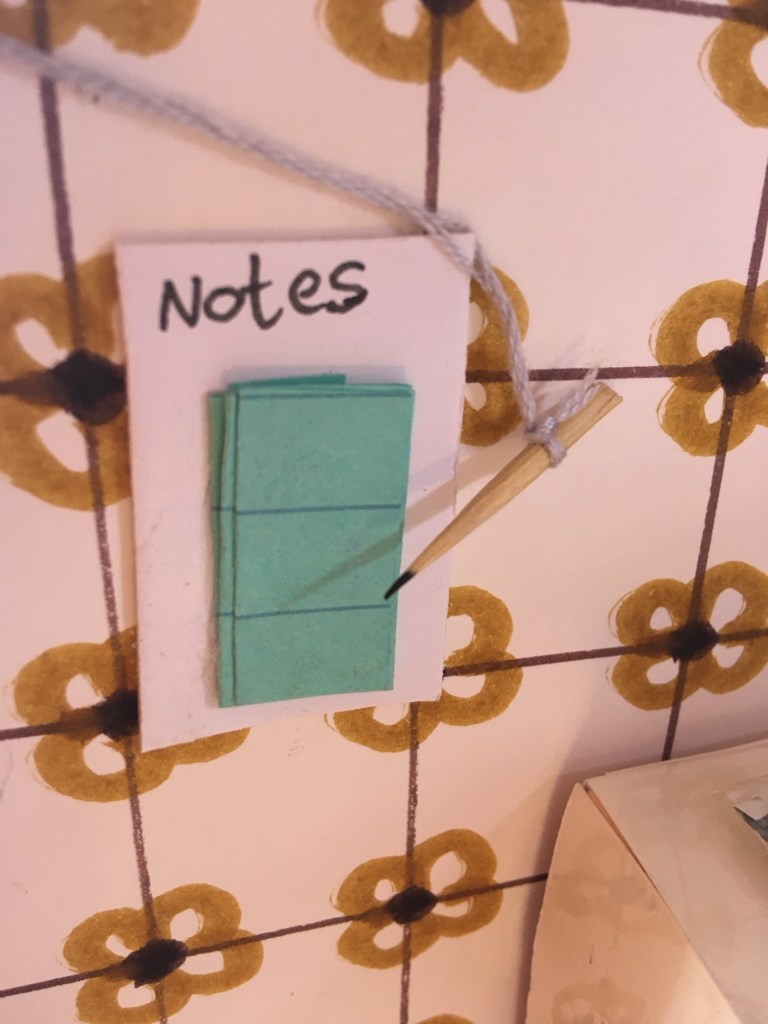
I used real notepaper and cut it down to size. The board is a piece of white mount board. The pencil is a cocktail stick which I cut to size and painted the tip with a black sharpie pen.
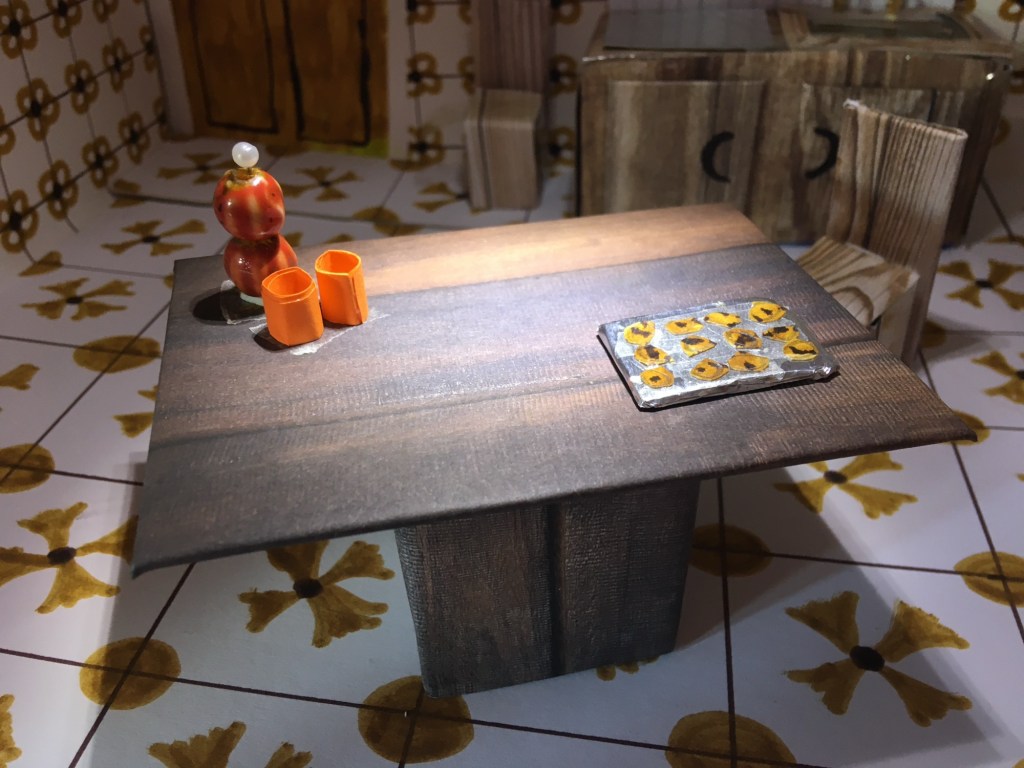
The table was simple to make. The bottle of drink on the table is made by gluing two beads on top of each other and the cap is a small white bead. The beakers are strips of orange card wrapped around a pencil and glued into place.
The cookie tray is a small piece of mount board wrapped with tin foil and the cookies were coloured onto a sheet of watercolour paper and dotted with dark brown pen for the chocolate chips. Then I cut them out and glued them to the tray. That was the fiddliest part of the entire kitchen, as they are so tiny.
I hope you’ve enjoyed having a look around my miniature kitchen. When I come back, I will have made a start on the dining room. So please follow this site to keep up to date with the latest developments.
See you next time and until then ……. HAPPY CRAFTING 🌅
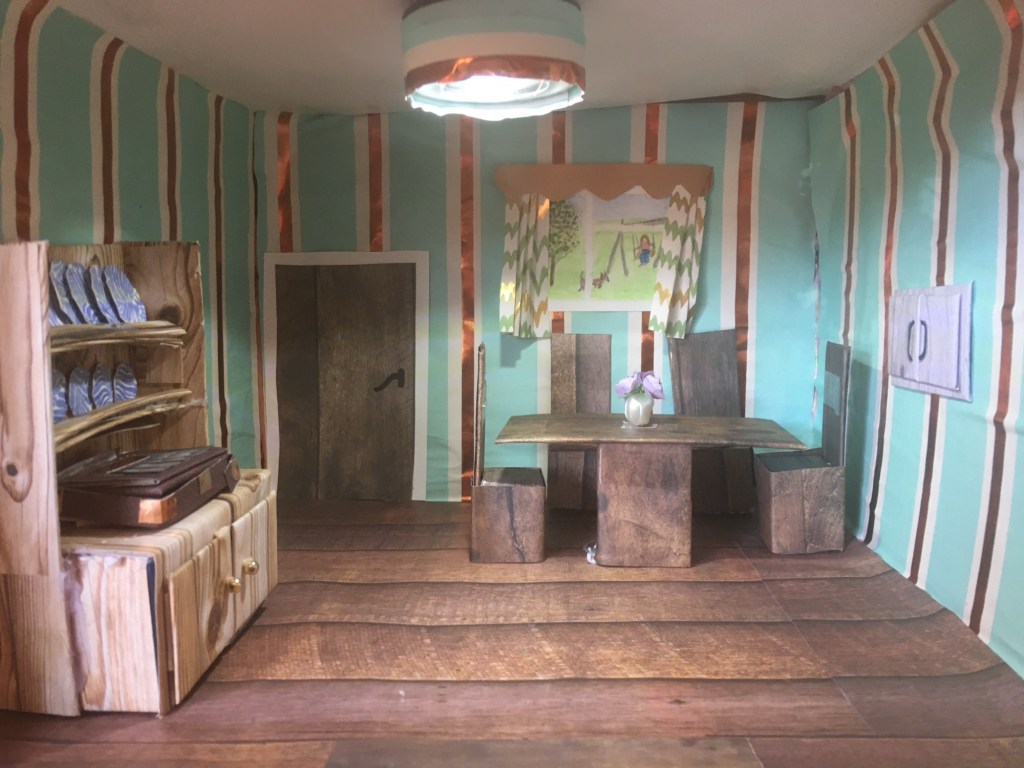
I’ve now completed the dining room in my dolls house, including the furniture and fixtures that I wanted to make for it. The above photo is a view of the entire room with everything in its position. It was fun to make, especially the dresser and the dinner service.
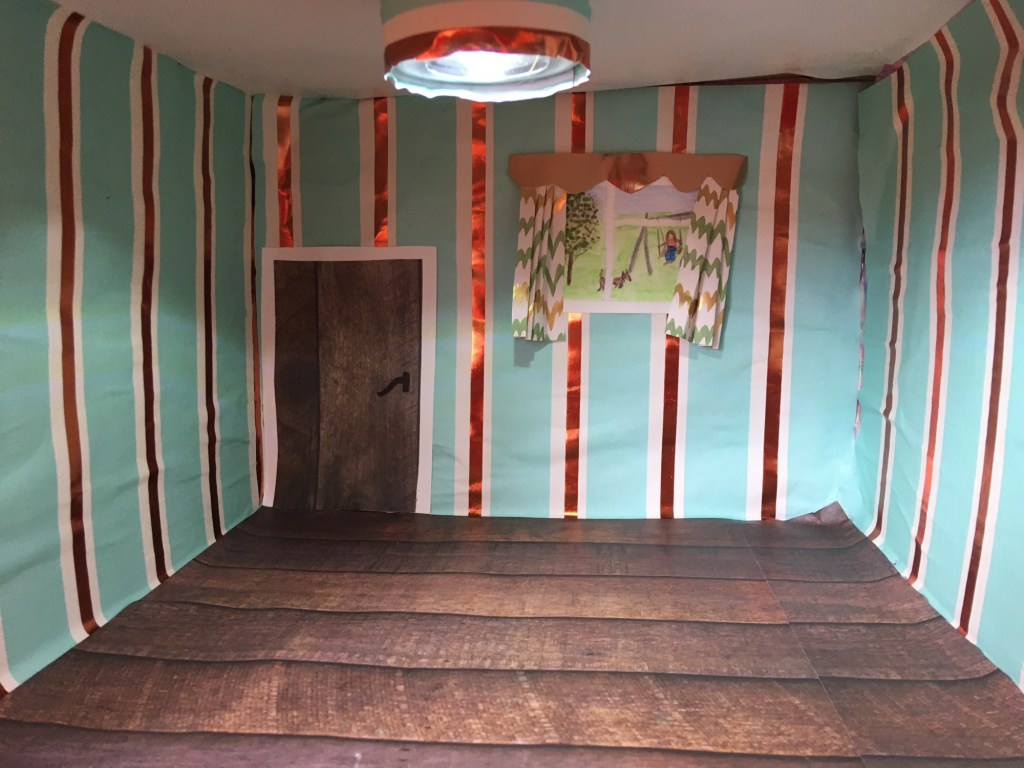
This is the dining room before any furniture was added. The wallpaper is wrapping paper and the flooring is wood effect craft paper. I added a window scene with a pelmet and curtains. The pelmet is made from gold mirror card and the curtains are made from thin patterned paper, and glued to the back of the pelmet.
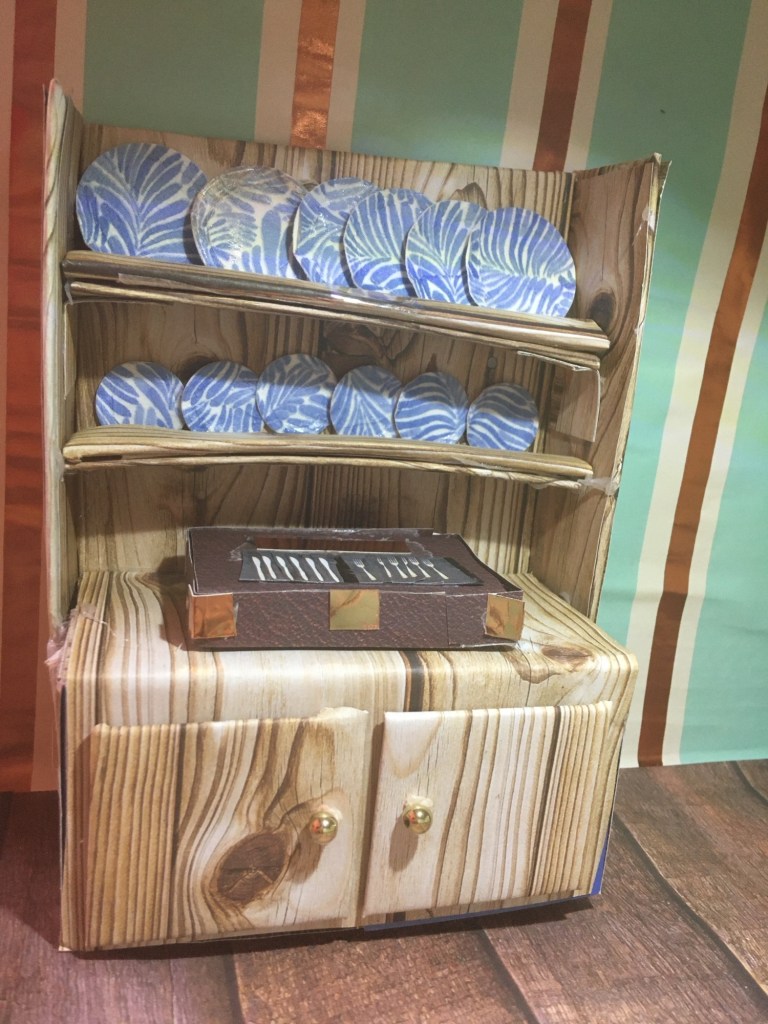
This was fun to make. I used boxes and pieces of mount board and covered them with wood effect paper. I wanted it to be a pine dresser, so I used pine wood paper. The plates are made from white card and the pattern is from a napkin which I glued to the card. I cut them with a small circle die and used a ball tool to shape the rims. The canteen of cutlery is a covered box and I photographed pieces of my own cutlery reduced them to size and cut out the image before gluing it to the top of the box. The paper I used to cover the box is a leather effect and I used 2 small beads for the knobs on the cupboards to the dresser.
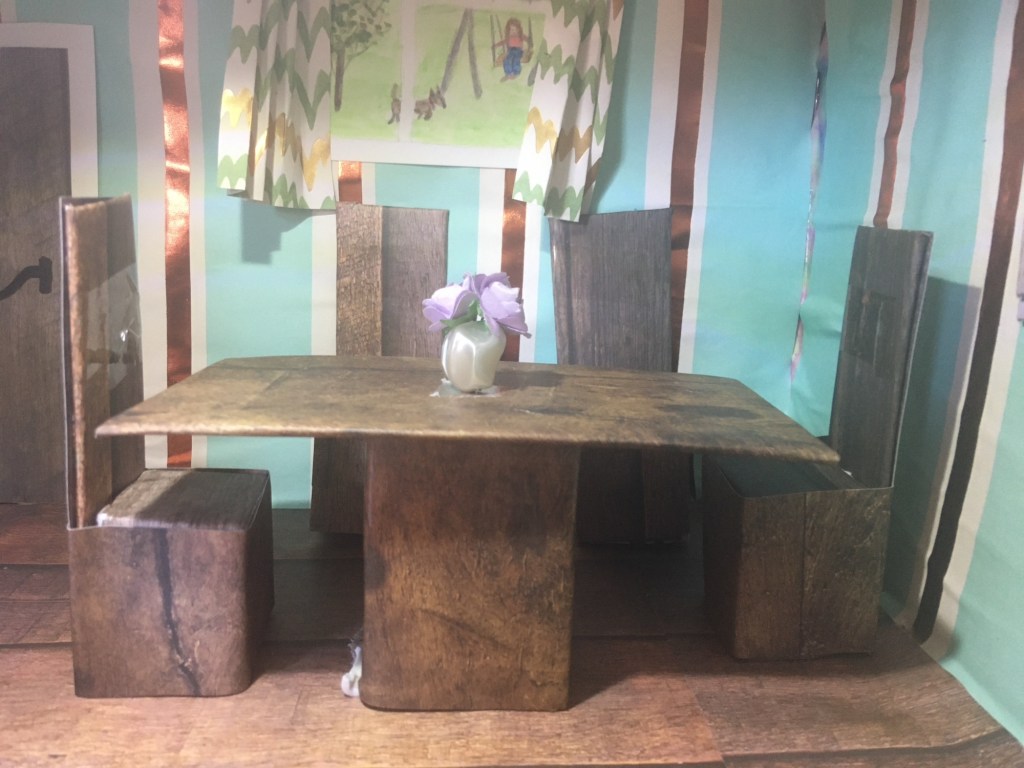
Again I used wood effect paper and covered boxes and mount board to make the table and chairs. The vase on the table is a large bead and I used paper flowers to go in the vase.
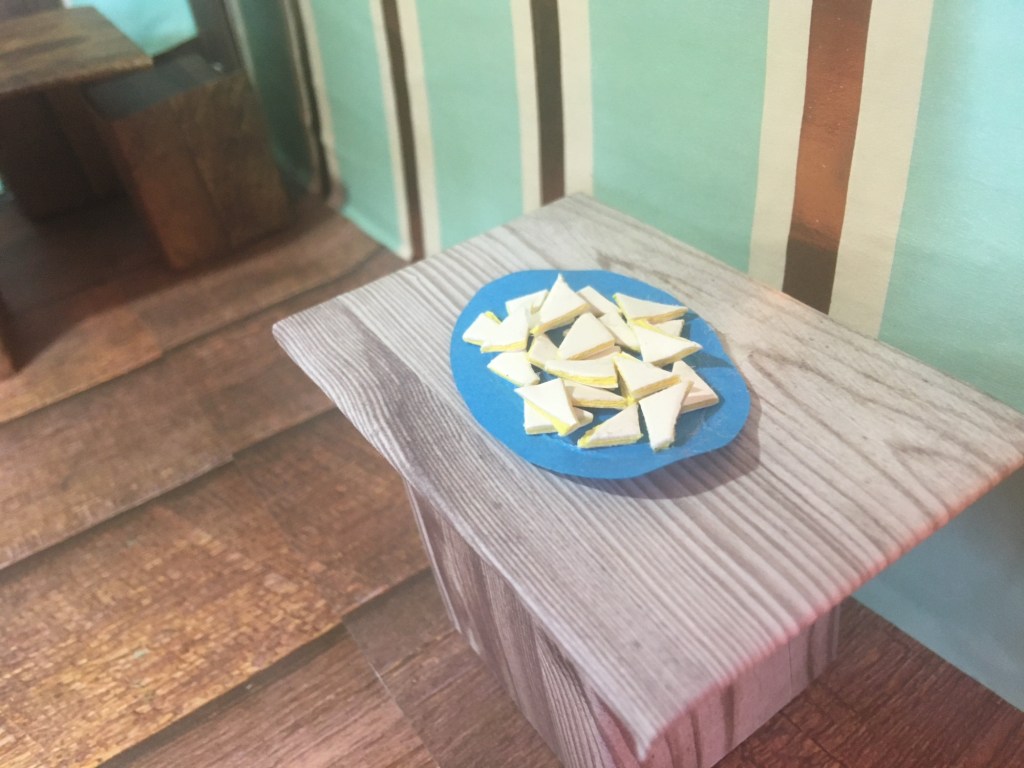
To finish off the dining room, I made a small table and added a plate of sandwiches. The sandwiches are very small so to make them I layered up 6×6 inch sheets of white and yellow card, cut this into tiny strips then into squares, and then cut each square in half diagonally to make a triangle. It was a bit fiddly, but the effect is quite realistic.
Well that concludes my tour of my miniature dining room, when I come back, I’ll show you the living room. 🌅

This is the living room before I added the furniture. The wallpaper is actually wrapping paper. The flooring took a bit of working out but eventually I decided to create a wood effect border with a carpet in the middle. I only had one sheet of this particular pattern for the carpet and nothing else would match it. It wasn’t big enough to cover the entire floor, so the wood effect border solved the problem. I added the curtains and pelmet to the windows to make it look more cosy. The light shade is a strip of paper from the same pack as the carpet, it’s just a different pattern. Now the living room is ready to move the furniture in.
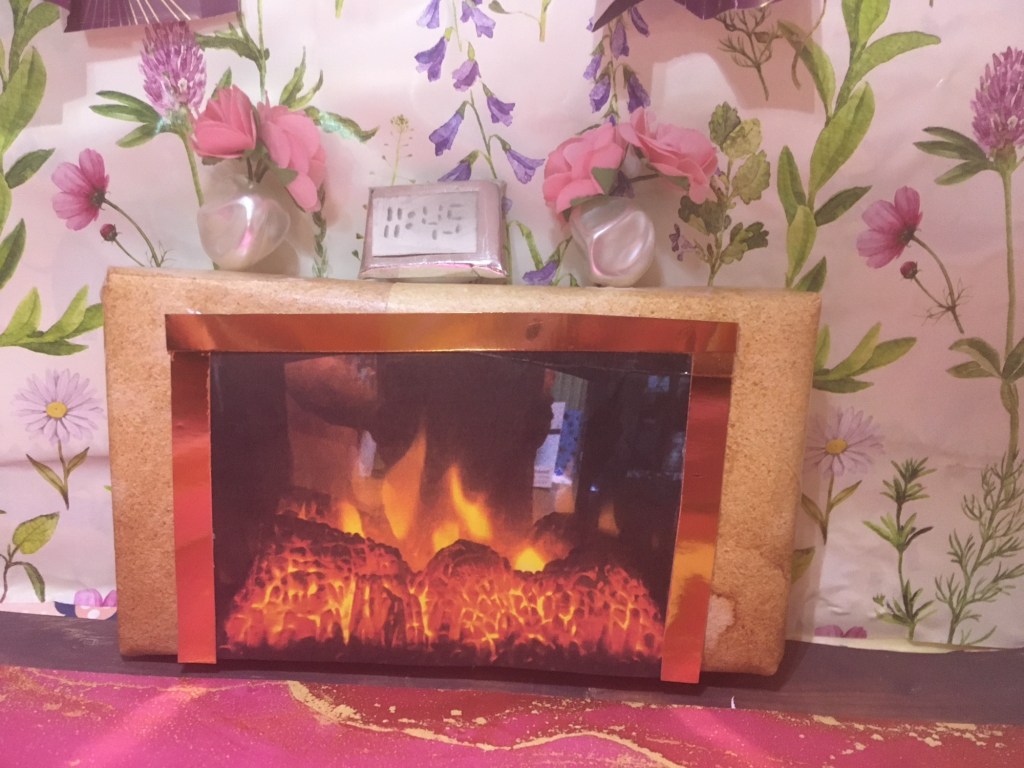
The first fixture I made for my miniature living room was the fireplace. The surround is a box covered with stone effect paper and the fireplace is a photo of my own fireplace, scaled down to size and glued to the front of the unit. The metallic surround is made from mirror card. The vases on the mantelpiece are two large beads with paper flowers added, and I made a clock to finish off the look.
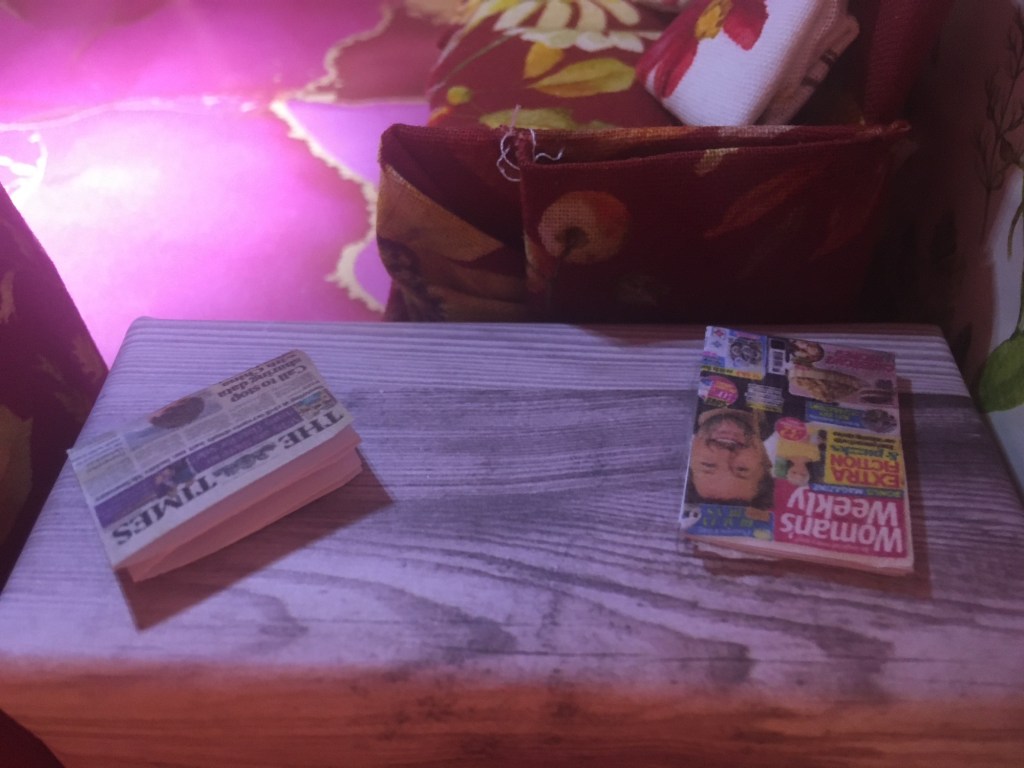
In one corner of the room, there is a table that creates an L shape for the two settees that are in the room. On the table I’ve made a miniature newspaper and a miniature magazine. These were fun to make and I’m glad I added them to my corner table.
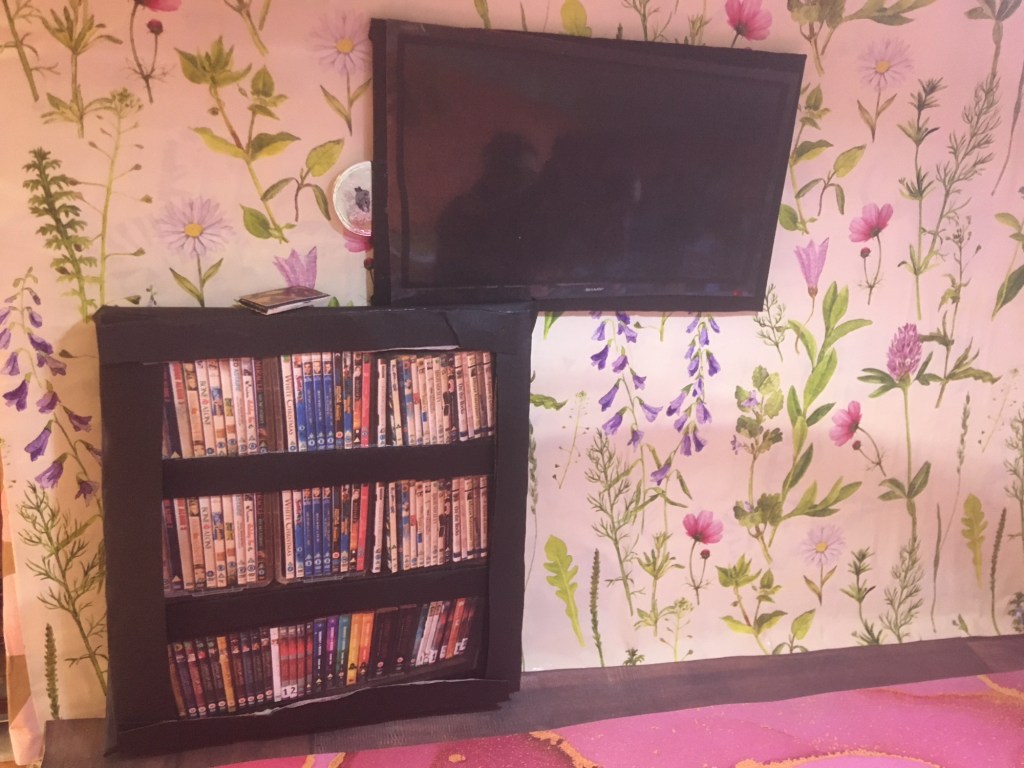
I made a miniature flat screen television to go on the wall. I thought it needed a dvd rack so I made one and added the mini DVDs. As a final touch I added a dvd sticking out of the tv and a dvd case on top of the unit. That was inspired by the fact that one morning I walked into my own living room and realised there was a dvd sticking out of the tv/dvd player. I thought I’d use it in my mini living room.

This is the living room when it was completed. There is a coffee table in the middle with three mugs and the remote control to the television/dvd player. You can see the settees and I think the room looks very cosy. When I come back to this page next time, I’ll show you the bathroom. We’re moving upstairs next and the bathroom will be the first of the upstairs rooms to be done.
Below is what the dolls house looks like so far.
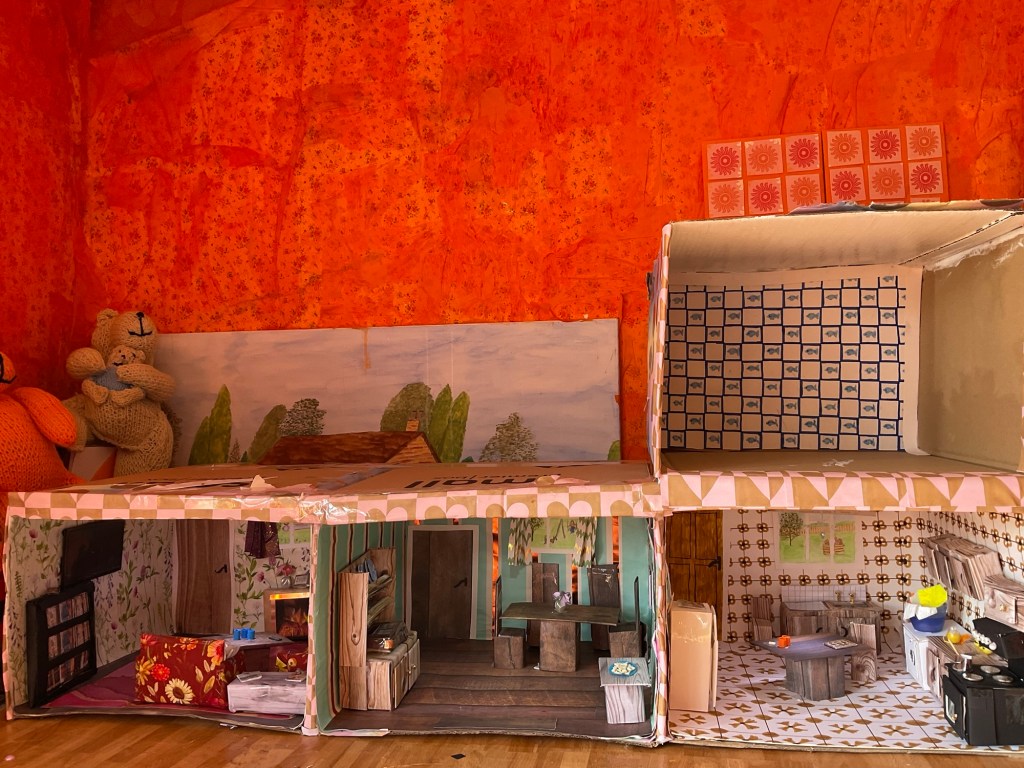
This is what my dolls house looks like at the moment. As you can see, I’ve added the box for the bathroom, and decorate the back wall. You can also see the surrounding items on my workstation at the moment. Much of that will not be seen once the house is finished. Its final resting place will be against the back wall.
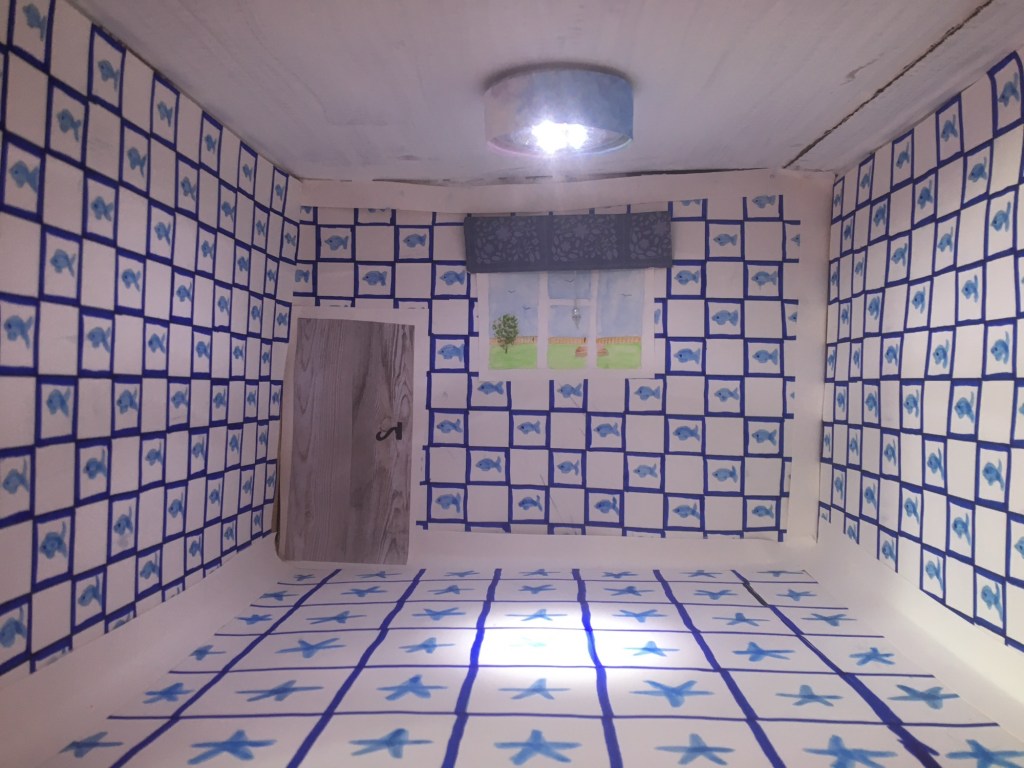
This is the bathroom of my dolls house before any fixtures were added. I painted the tiles on the walls and the floor with alcohol markers. The wall tiles were originally going to be dolphins, but they are very small and I couldn’t draw a dolphin small enough to fit into such tiny squares, so I changed them to fish. The starfish floor tiles were originally going to be every alternate tile and the next one white, but I went a bit mad and ended up painting all of the tiles. The window blind is a piece of patterned paper that has been rolled and glued into place with a length of cord and a bead at the end.
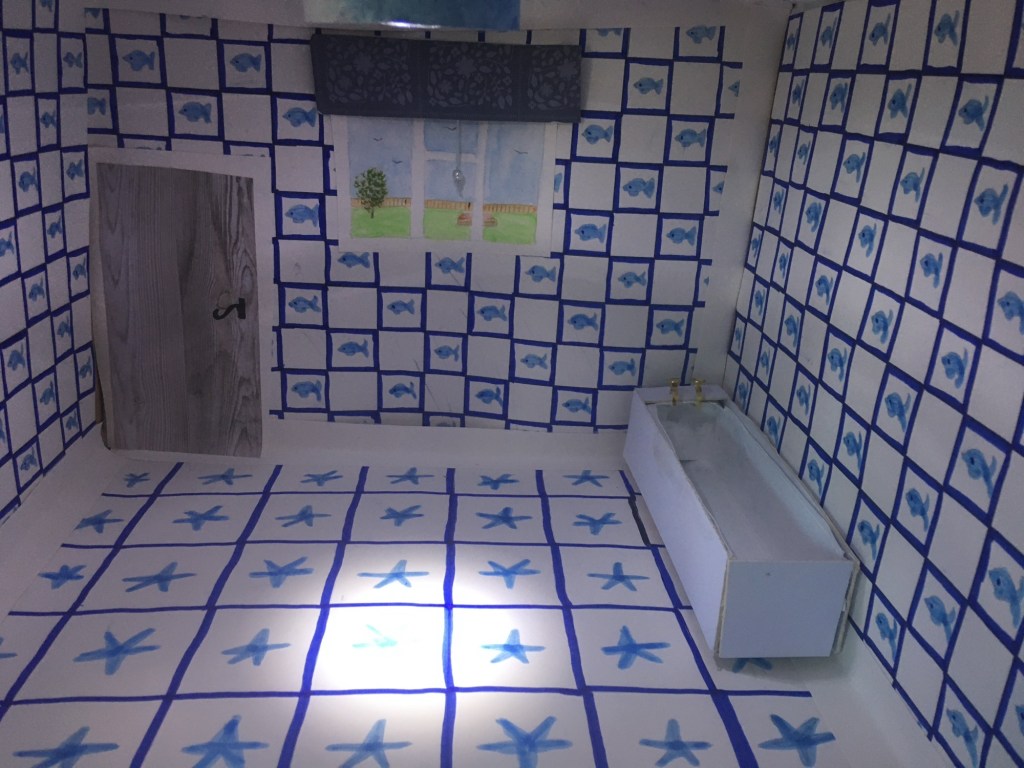
The first fixture that I added was the bath. This started out as a box from a tube of toothpaste which I covered with white mount board. The taps (faucets) are actually two brass brads or split pins where one of the legs has been bent into the shape of a tap or faucet.
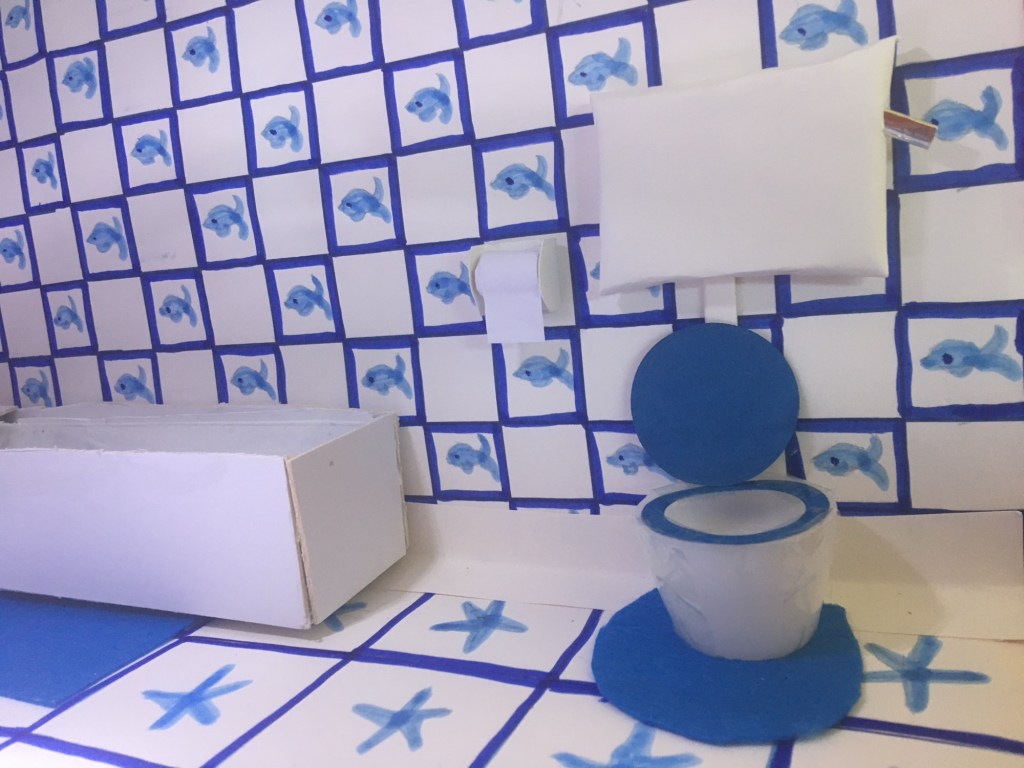
This was such great fun to make. I originally had no idea how I was going to make a miniature toilet but then when I was looking for something else in my bedside drawer, I found the white lid of an old roll on deodorant. I’ve no idea why I kept the lid, but I’m so glad I did as it made the perfect toilet bowl. The seat and lid are made from card and the cistern is made from a thick piece of card wrapped with white paper. The mat is cut from a piece of blue felt.
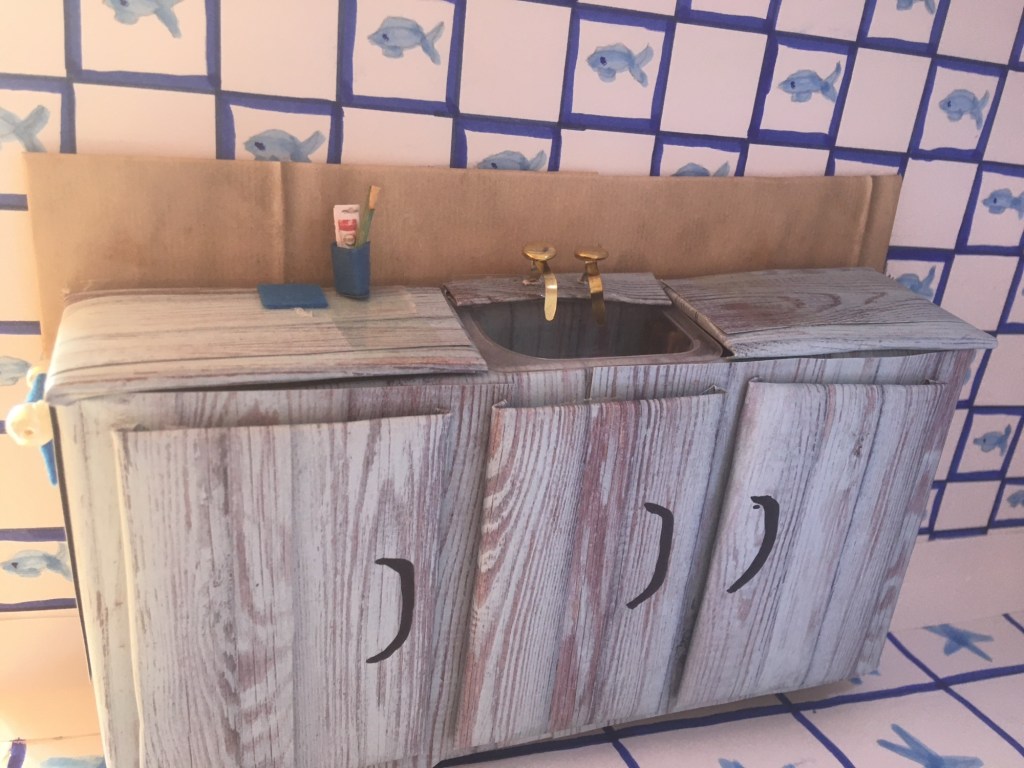
I wanted to add a unit here, not just a basic bathroom sink. The cupboards are made from covered boxes. The toothbrush is made from a cocktail stick painted with pen and the brush part is a smaller piece of cocktail stick left its natural colour and glued into place. The tube of toothpaste is a roll of printer paper flattened at one end and for the branding I photographed a real tube of toothpaste, scaled it to size cut it out and glued it onto my homemade tube.
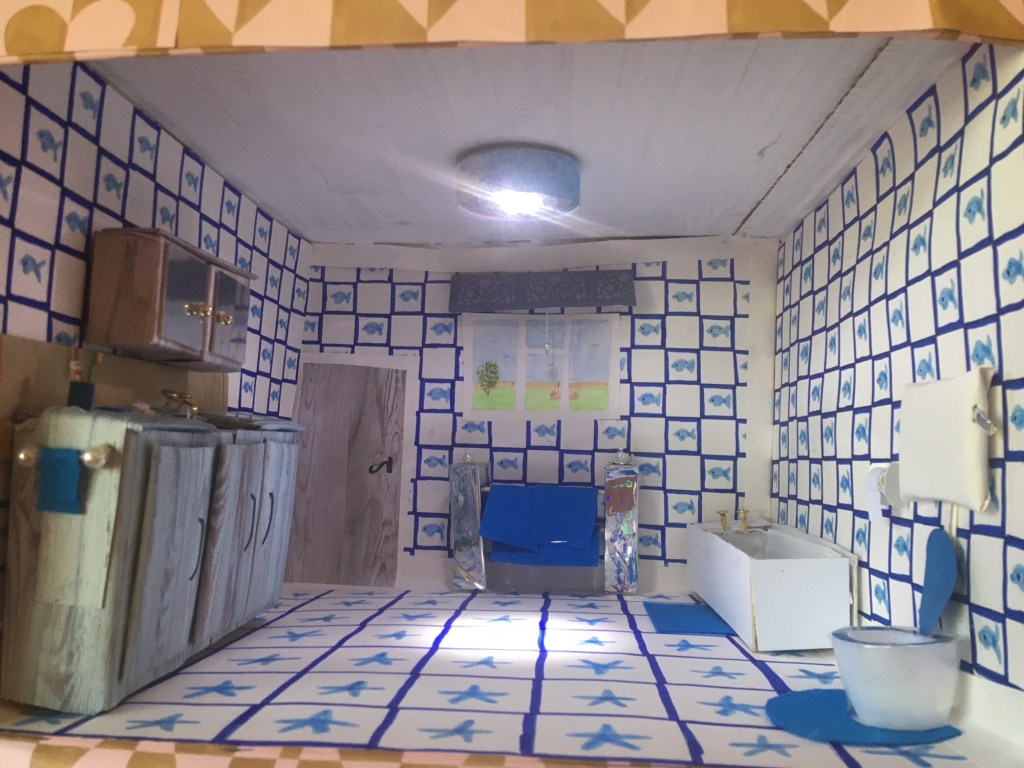
I added a bathroom cabinet above the sink unit to finish off my miniature bathroom. I used silver mirror card for the doors and beads for the handles. I also added a towel rack at the back of the bathroom. I’m really pleased with how this room has turned out.
The next room is an annexed room of the master bedroom and nursery, which I’ll show you next time. I’m saving the last room for a very special project.
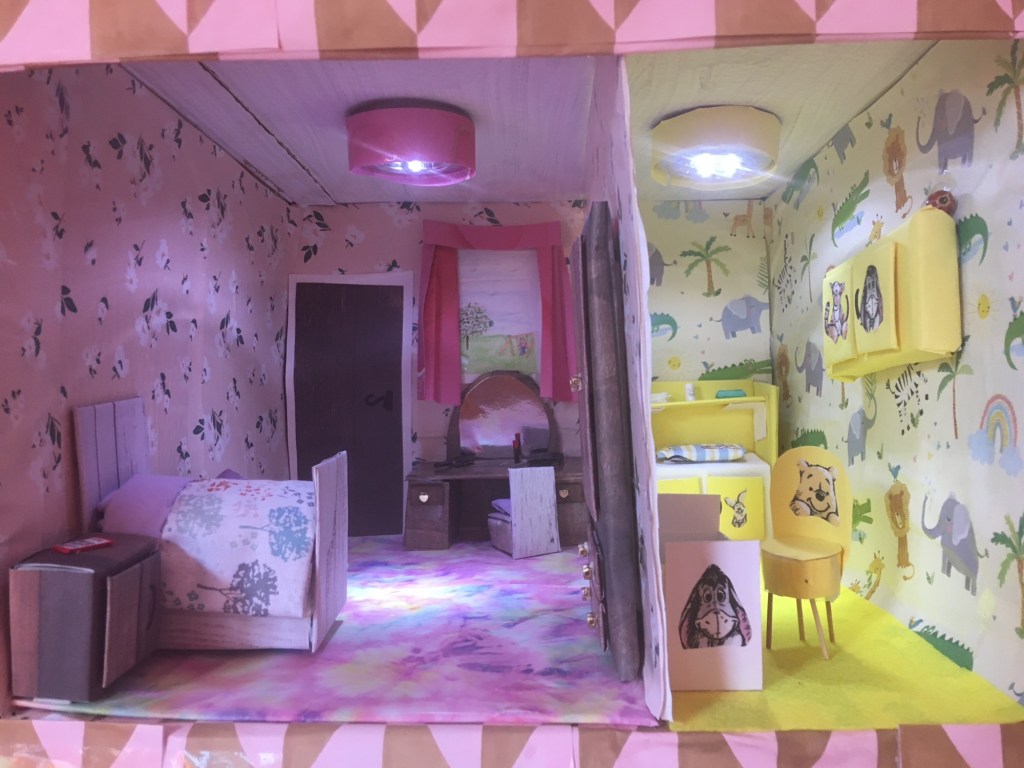
I decided to annexe this room as I wanted to save the last room for something very special. I made a partition to separate the master bedroom from the nursery. I did have to downscale the furniture slightly to fit it all in, but it looks very snug and cosy. I placed a separate light in each room to maximise on the brightness of each room.
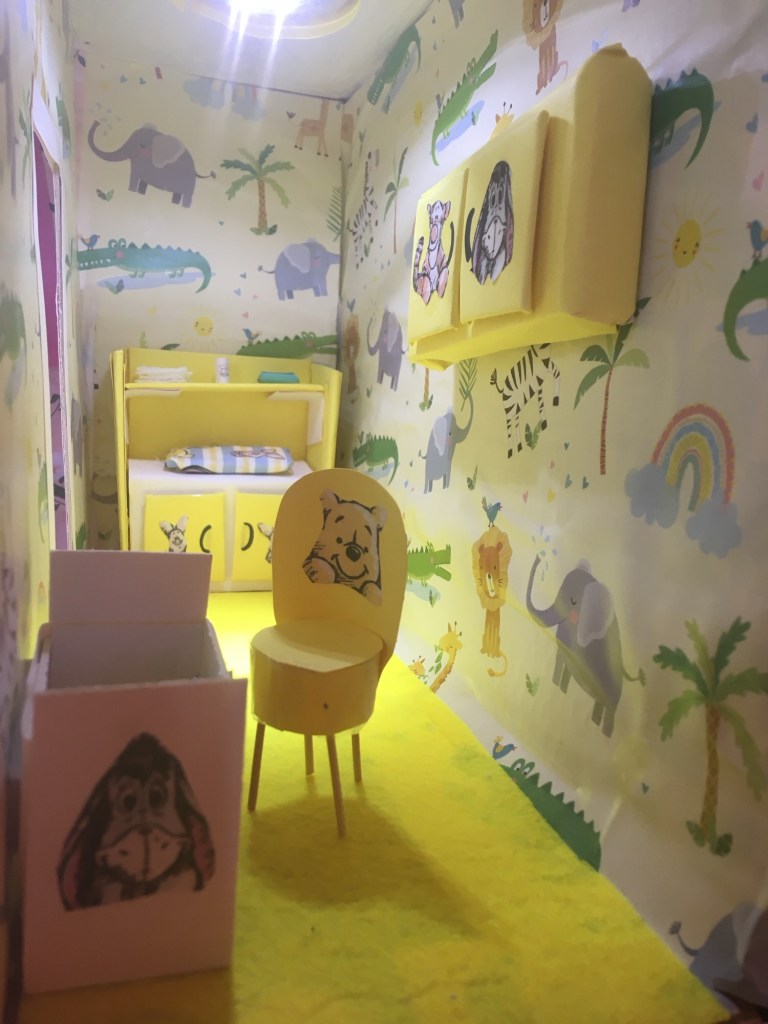
This was fun to create. The wallpaper is wrapping paper from the children’s section in a stationery store. It matched the colour scheme that I was going for. The carpet is a piece of yellow felt that I glued to the floor. I made the cot and other furniture from covered mount board. The characters on the furniture are printed from a piece of fabric that I used for bedding in the cot and the changing mat on the unit at the back of the room. The small chair is made from a bottle cap covered with yellow card and the legs are from a barbecue stick that I cut down to size. I cut a gap in the division to provide access from the nursery to the master bedroom.
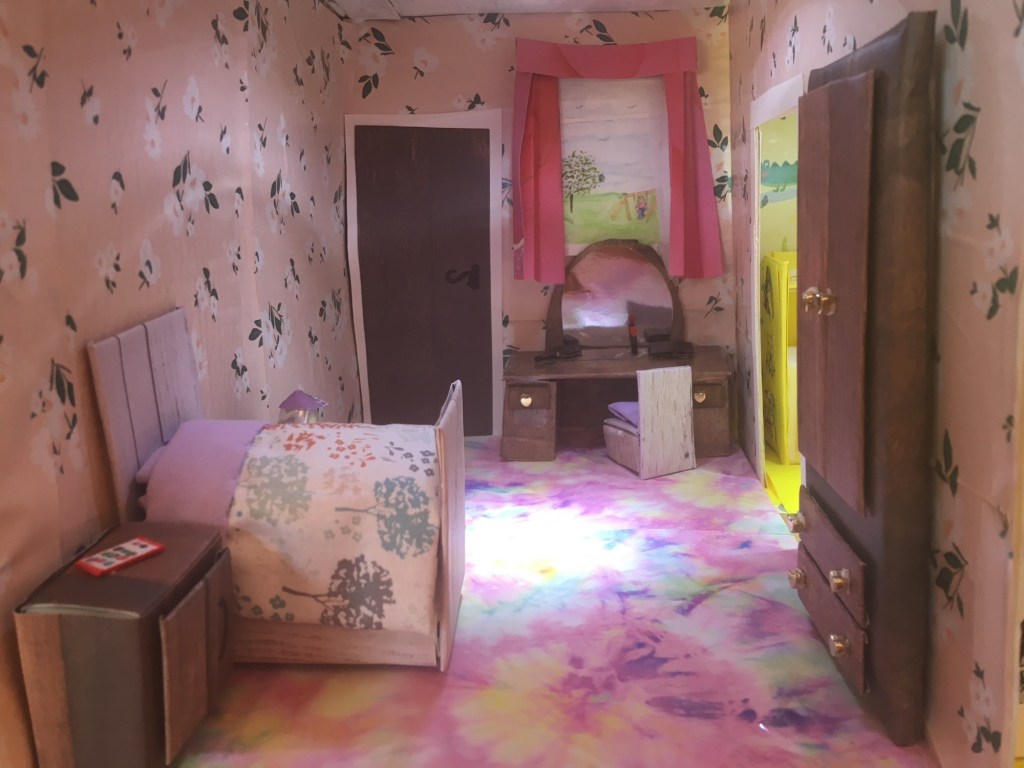
Again, the wallpaper is wrapping paper, and so is the carpet. I wrapped it around a piece of mount board to keep it flat and glued it down to the floor. The mirror on the dressing table is made from mirror card and the rest of the furniture is made by my covered box technique. The mobile phone on the bedside table is from a real phone that I photographed, scaled down to size and then cut out. The lamp on the far side bedside table is made from a large white bead and the lampshade is a piece of patterned paper that I cut to size and glued on top of the bead. You can see the gap leading to the nursery from this angle.
I’m very pleased with how this room set turned out, and I’m looking forward to showing you the final room. It’s a room that isn’t usually found in a regular home, but one that I wanted to add. I’ll catch up with you next time to show this final room, plus a photo of the completed dolls house. 🌅
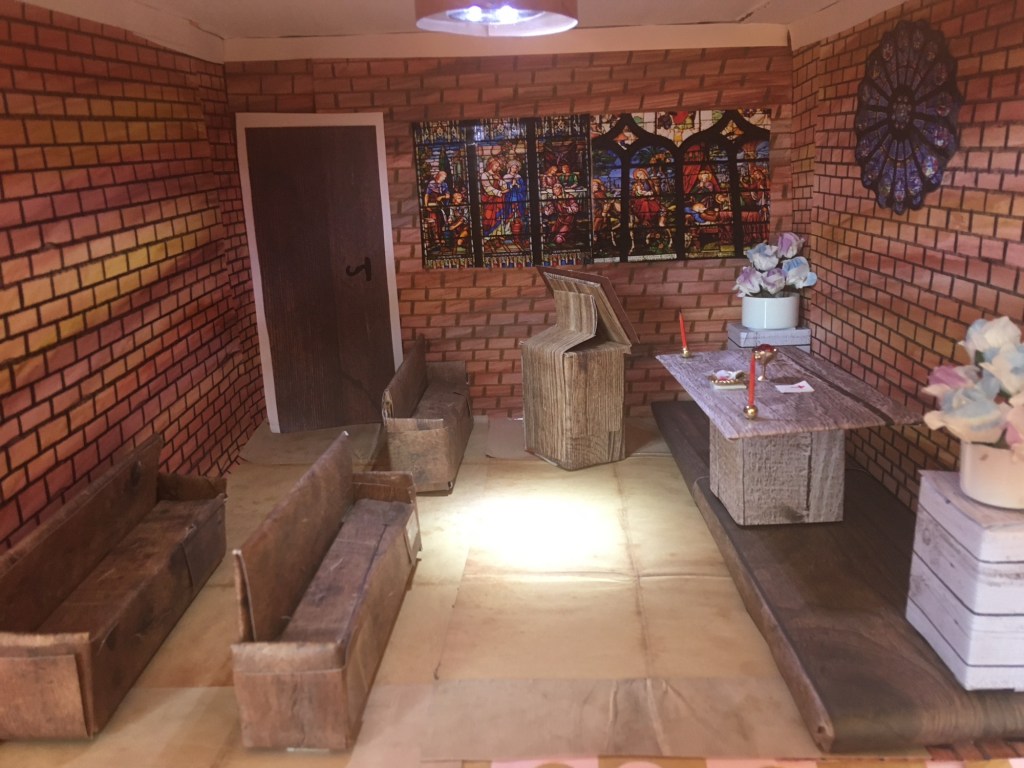
The final room in my dolls house is a chapel. It’s the reason I made the previous room annexed, so that I would have room for a chapel. I know it’s not a room that’s found in many houses, but I wanted to include one, so that’s what I did.
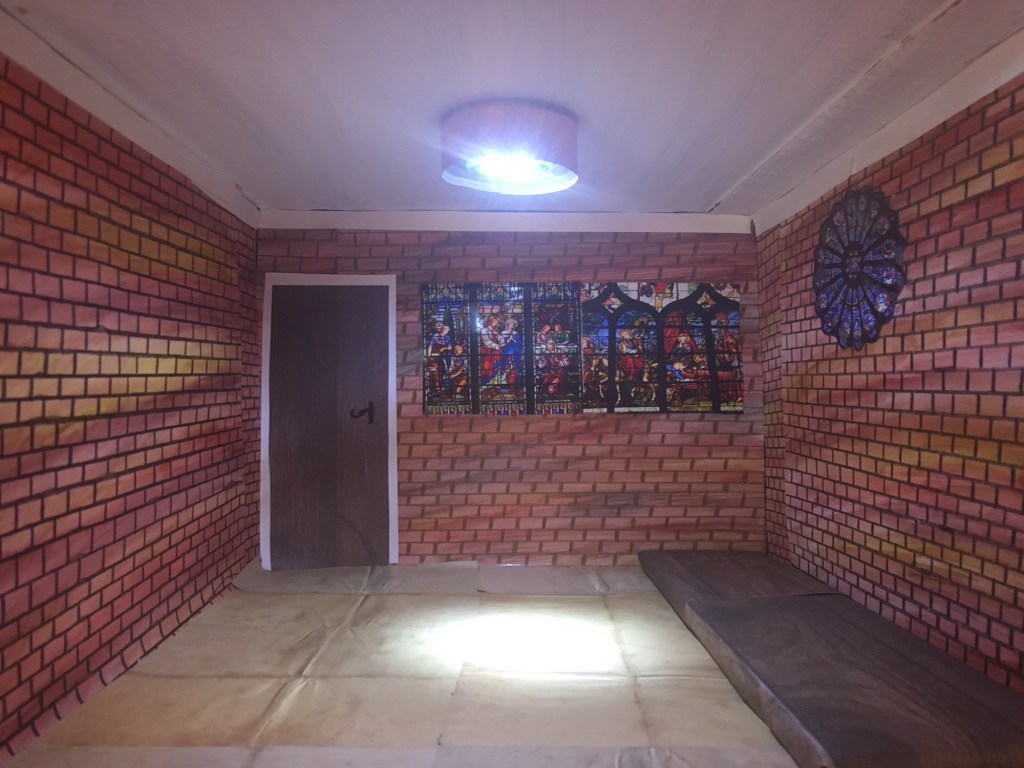
This is what the chapel looked like before any fixtures were added. I pained the brickwork onto cartridge paper and the stained glass windows are from a photo app that I have. I made a small chancel step for the altar, which you’ll see in the next photo.
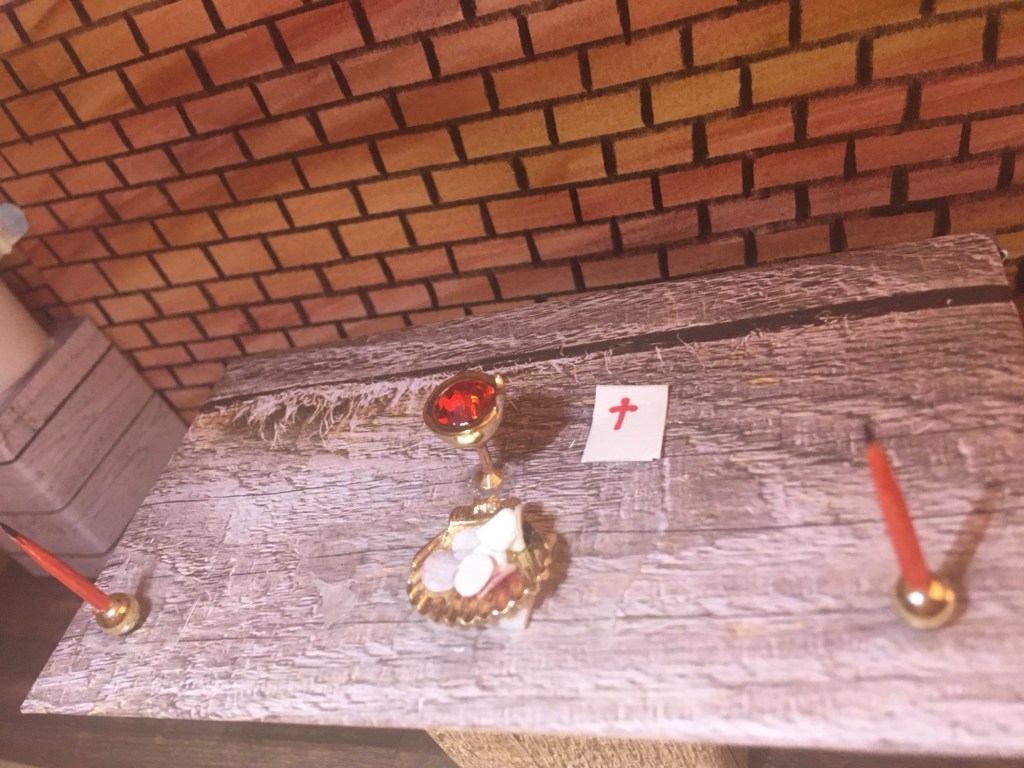
I found a small charm that resembles a goblet of red wine, and to me, it looked like a chalice for Holy Communion. I also found a tiny shell charm which I used for the Communion hosts or bread. I made a couple of candles and a small chalice cloth. The pews in the top picture are made by covering boxes with wood effect paper and gluing them together. The final picture will show what the dolls house looks like now that it’s complete.
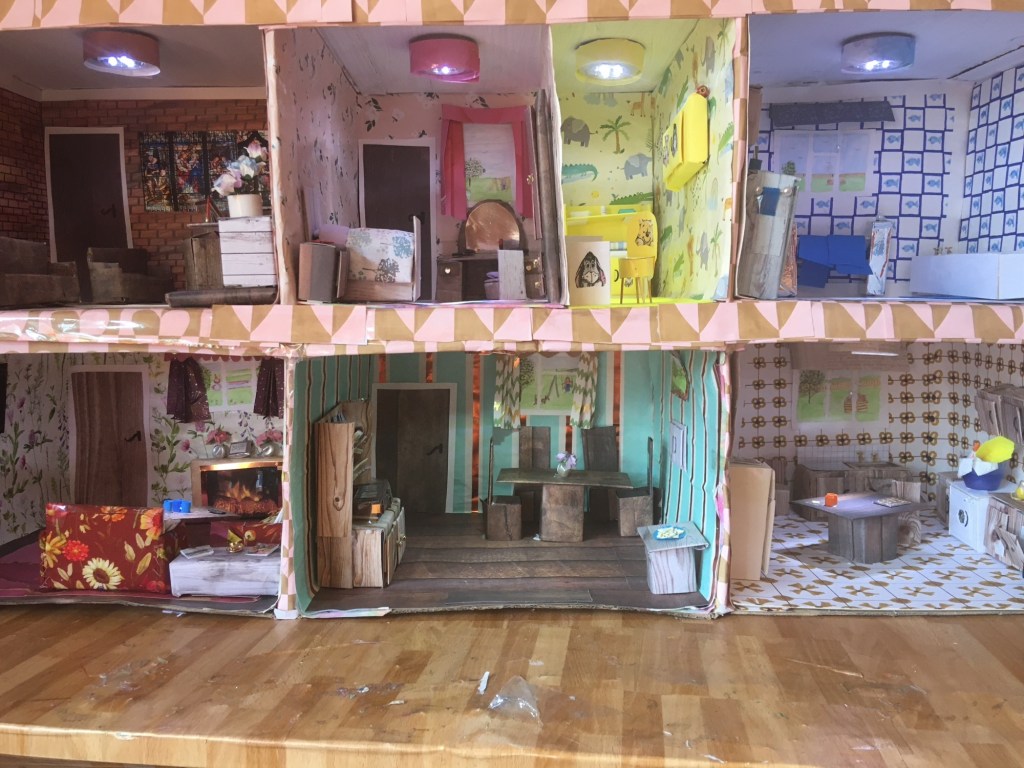
This is what my dolls house looks like now that it’s completely finished. I’ve had so much fun making this and I’m pleased with the result.
I do have an idea for a larger room on the top, so that I can make a sloped roof and make it more like a house shape. My plan is to make a library/study, but that will have to wait for another time. I will, of course, post photos of it here if and when I decide to go ahead with that.
I hope you’ve enjoyed the tour of my dolls house. 🌅

Leave a comment