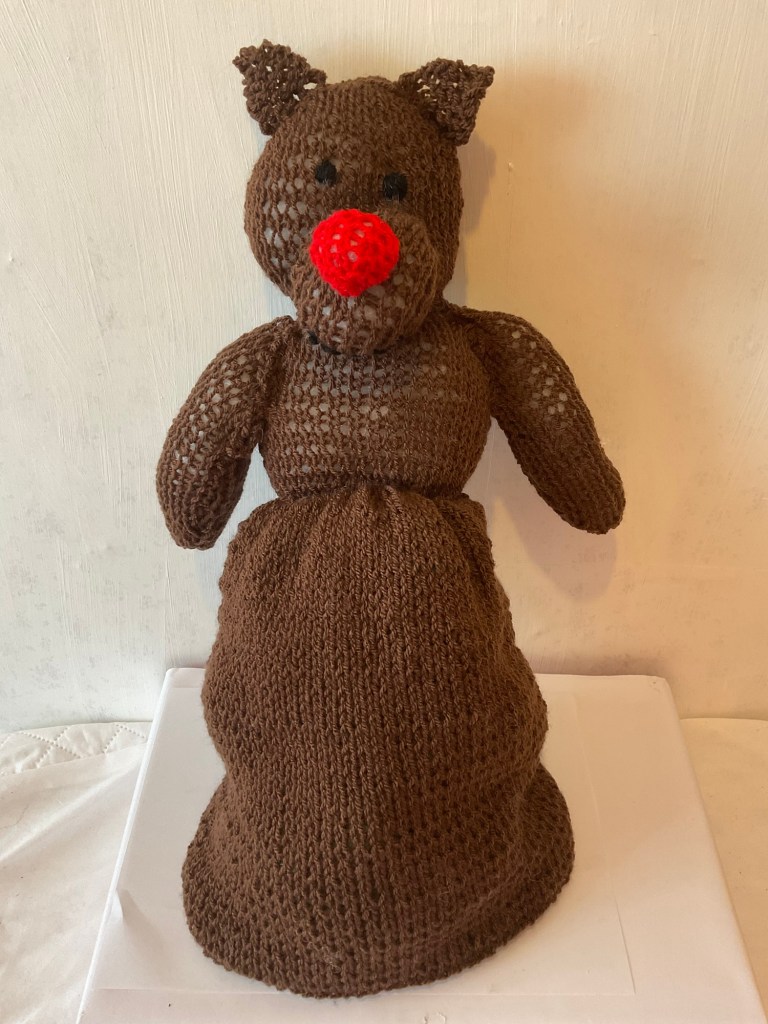
This is one of my transformer toys, and I have three others in this range. They can be made in any combination so that one can transform into whichever other character you like. Here are the other three:
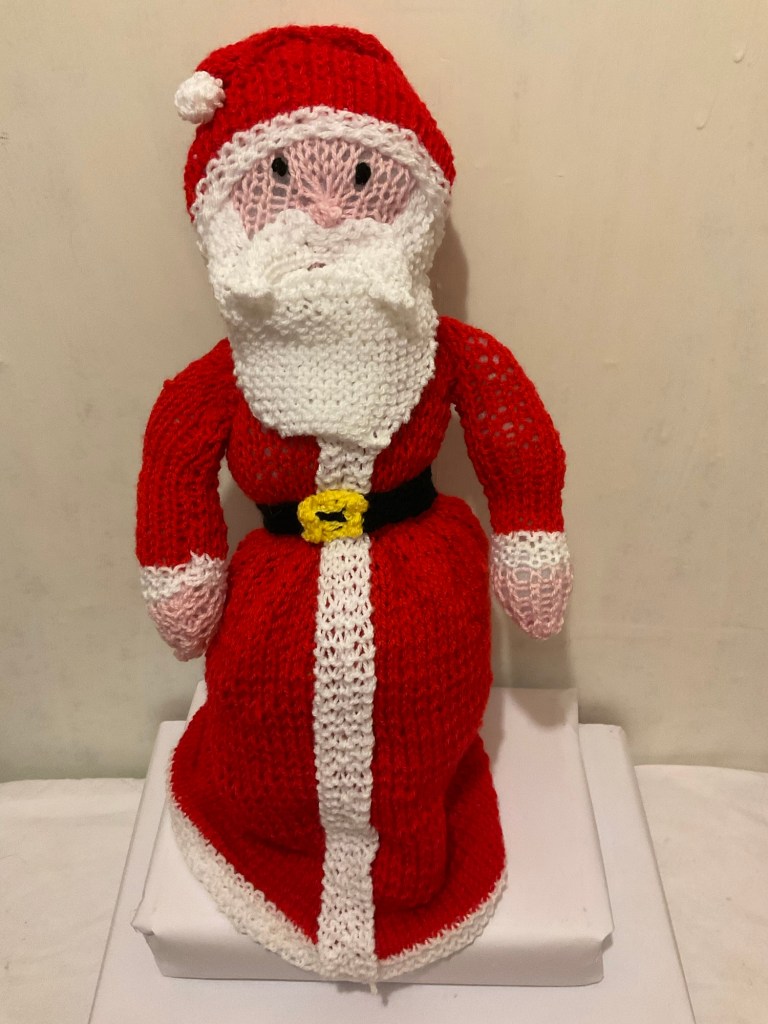
He was coupled with Santa Claus in my original pattern, but he can be made to go with any of the others.
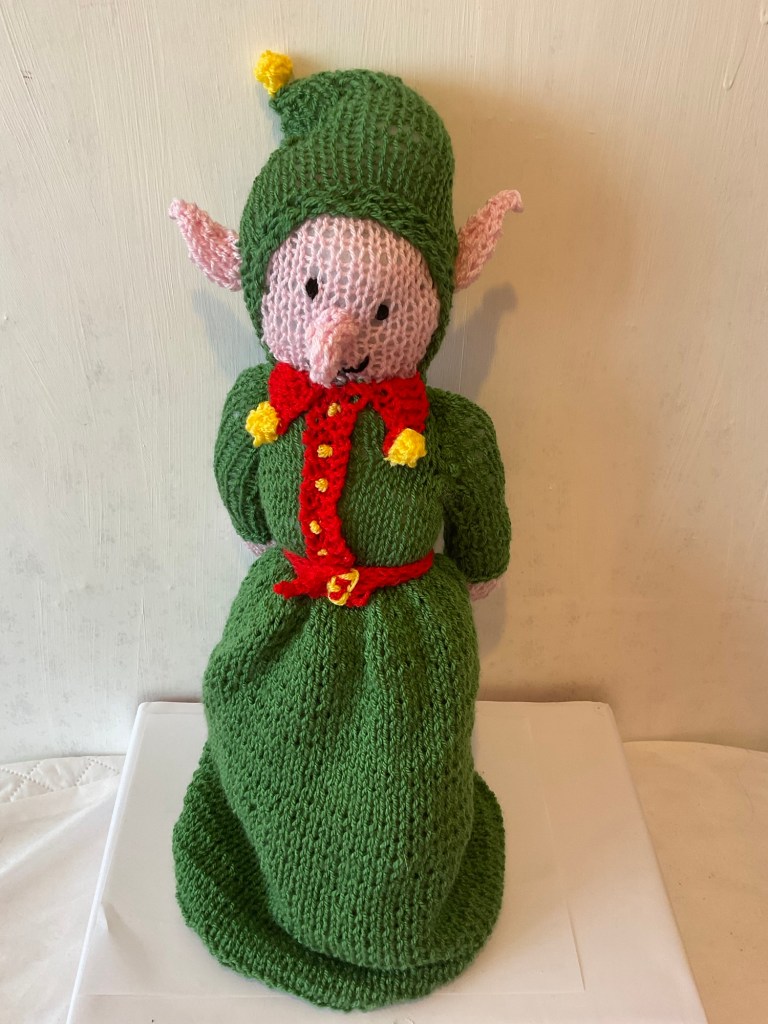
Eli is one of my Christmas transformer toys and the other one is Rudolf. Come and see.
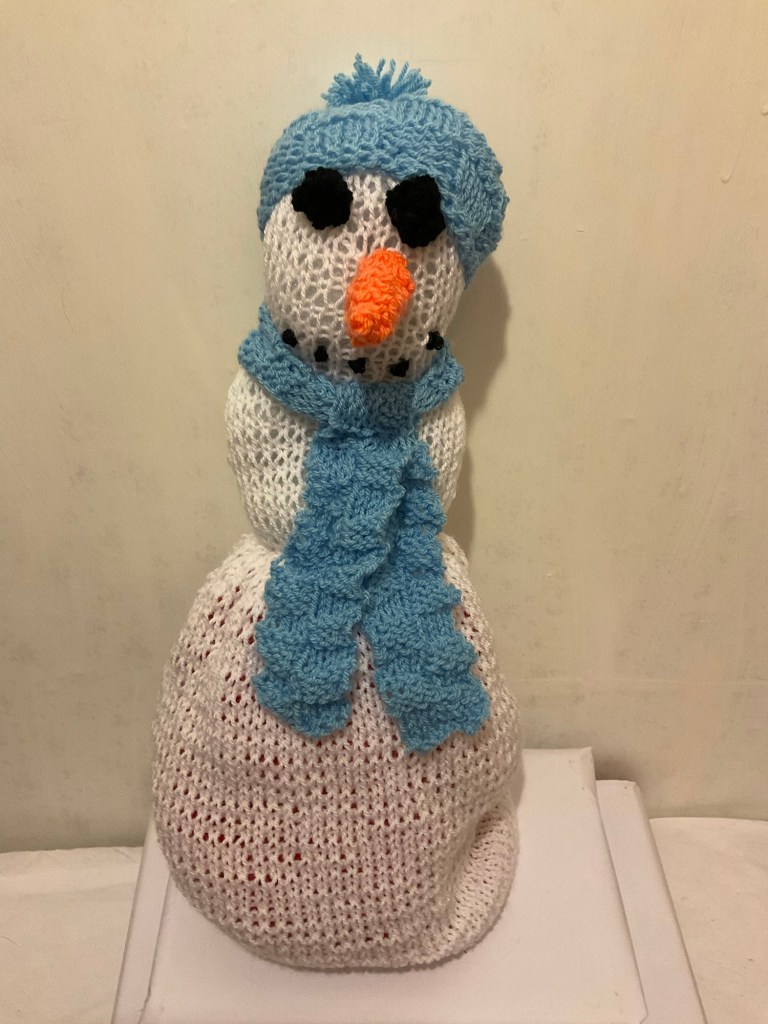
He is the latest of my Christmas transformer toys. See the video clip on the transformer toys page to see how they work.
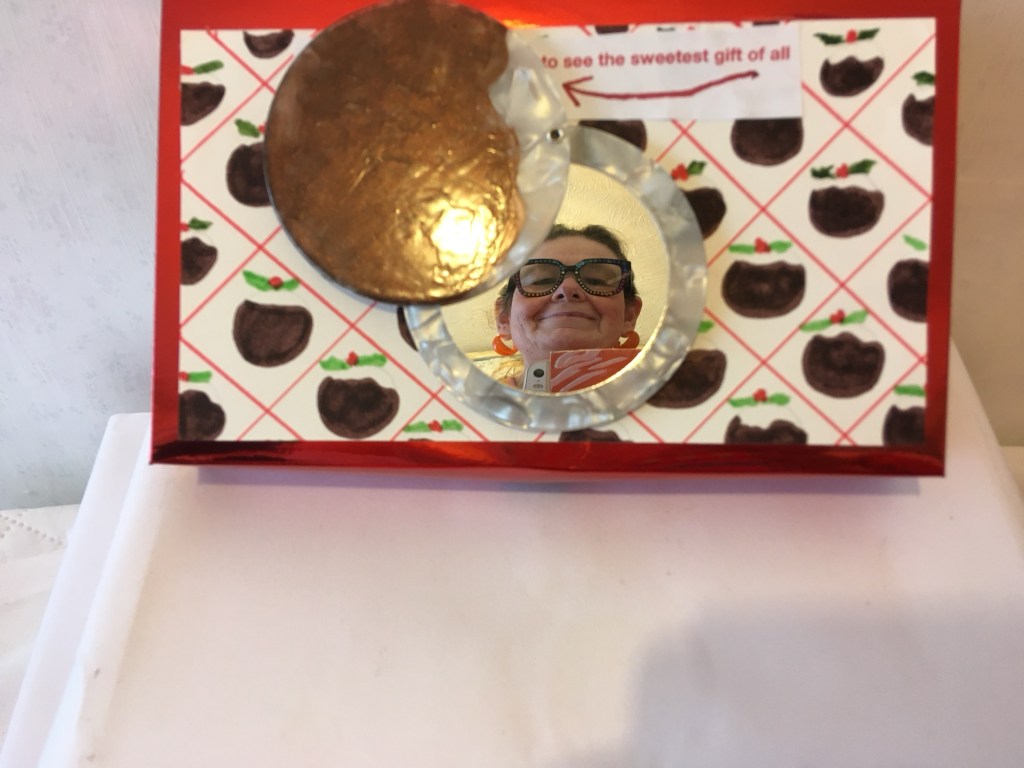
This was so much fun to make, and they are proving very popular. The box is made from red mirrored card, and I designed the mirror on the lid so that it coordinates with the paper and swings open to reveal the recipients face. So the wording at the top of the box says, ‘twist the Christmas pudding to see the sweetest gift of all,’ and when they do, they see a reflection of themselves. So there is a double surprise. A box where the person can see their face, as well as the gift inside of the box. I am painting more mirrors very soon.
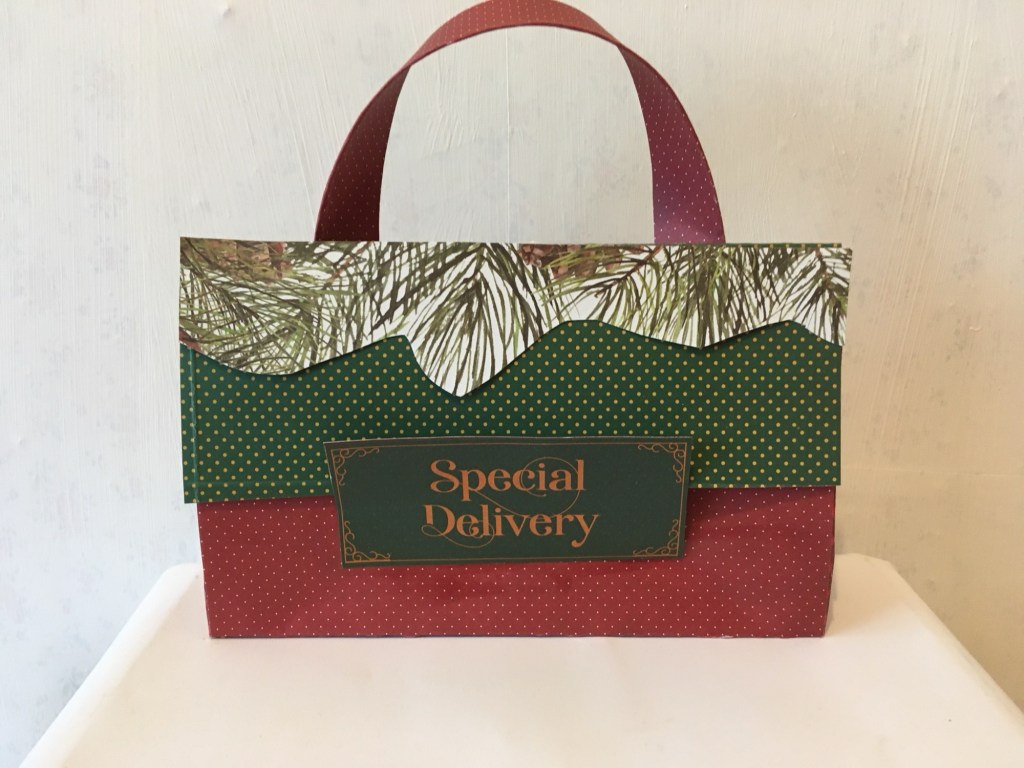
This is a very handy gift bag for those presents that are awkward to wrap. They are also perfect for any recipient who may have manual dexterity problems, as there are no fiddly clasps or ribbons to fuss with. Just flip the flap out from under the sentiment and it will open easily. You can keep the bag for the following year if you wish.

These are perfect to have around to keep a list of all of those arrangements you have to make at Christmas. It’s very satisfying to cross each job off as you do it, and you don’t even have to open it like you would a notebook. It’s just there ready to be written on. This clipboard is supplied with a designer clip, a pen loop and a stock of paper so it’s all ready to use.

This is very useful for storing all of those precious memories at Christmas. Of course, many will be taking photos on their phones, and that’s great. But with this album, you can print off those photos and keep them safe. It’s an A4 size so there is plenty of room to add your photos and write your notes as well. The perfect Christmas memory storage that you can look back on and keep adding to it for as long as you have spare pages. Many people keep photos of children and date them. Then they have a record of how they change the years and it’s always nice to look back at the early pics once the children are grown up. – and don’t they grow up fast.
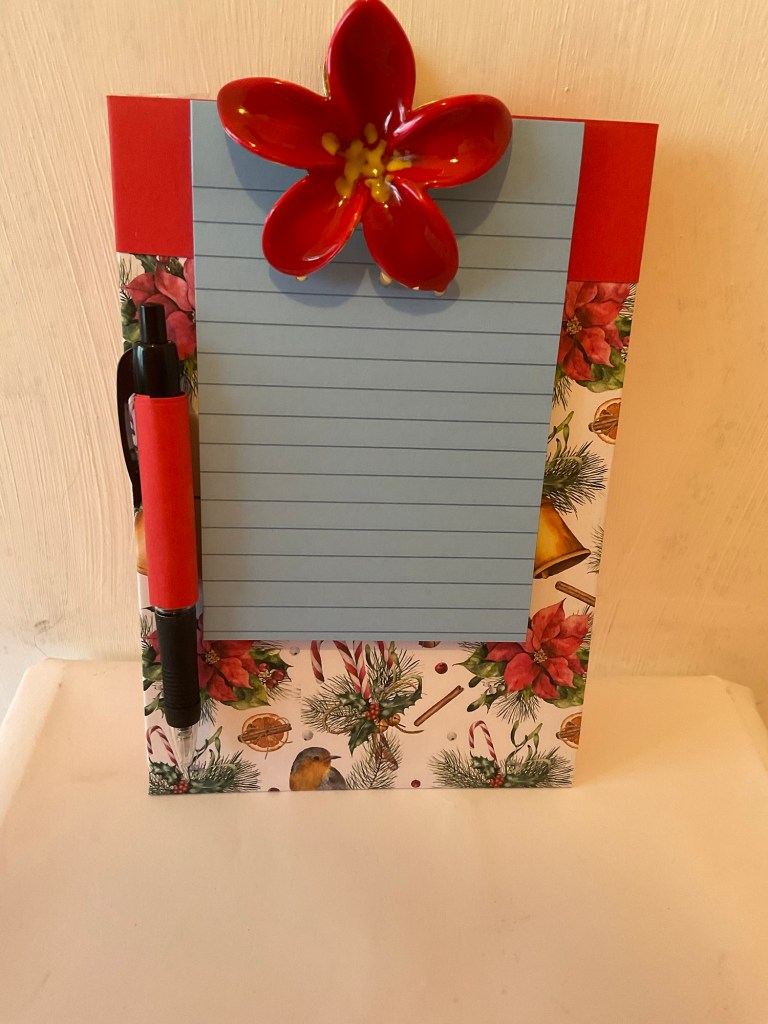
This pretty poinsettia clipboard is very handy to have around the home when you are planning those holiday festivities. Food lists, gift and greeting card lists, shopping lists. A clipboard can often be so much more convenient than a notebook for these occasions. Just flip the page over and you have your next list of jobs to do. It makes planning more simplified, and we all need that at Christmas when it’s such a hectic but fun time. As with all of my clipboards, this one comes with a pen loop (but not the pen,) and a stock of paper.
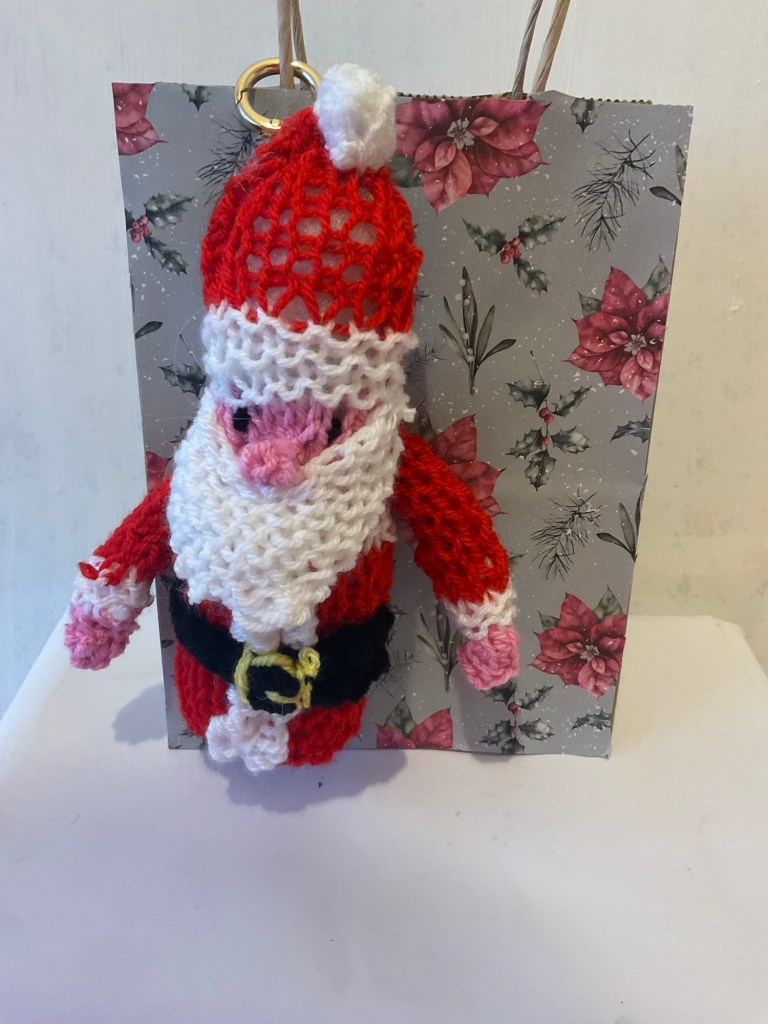
This is my first Christmas bag charm. A delightful Santa Clause. He is fun and easy to knit and makes a great addition to any Christmas gift bag, or even a festive key ring. He can be hung up as a decoration and he would still look super cute. This character is my favourite addition so far to my Christmas products.
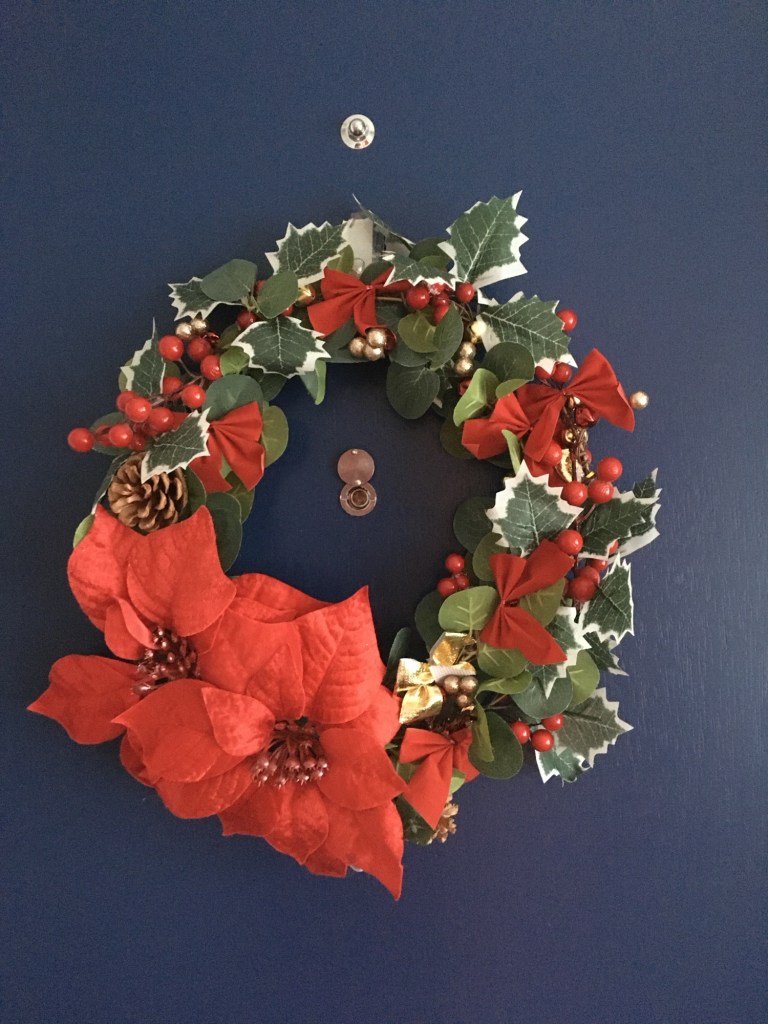
I loved making this wreath. I used a wire wreath frame as a base, and added leaves, holly and berries to fill it out. I added two gorgeous poinsettias to finish it off, and it is hung by a ribbon at the back of the wreath.
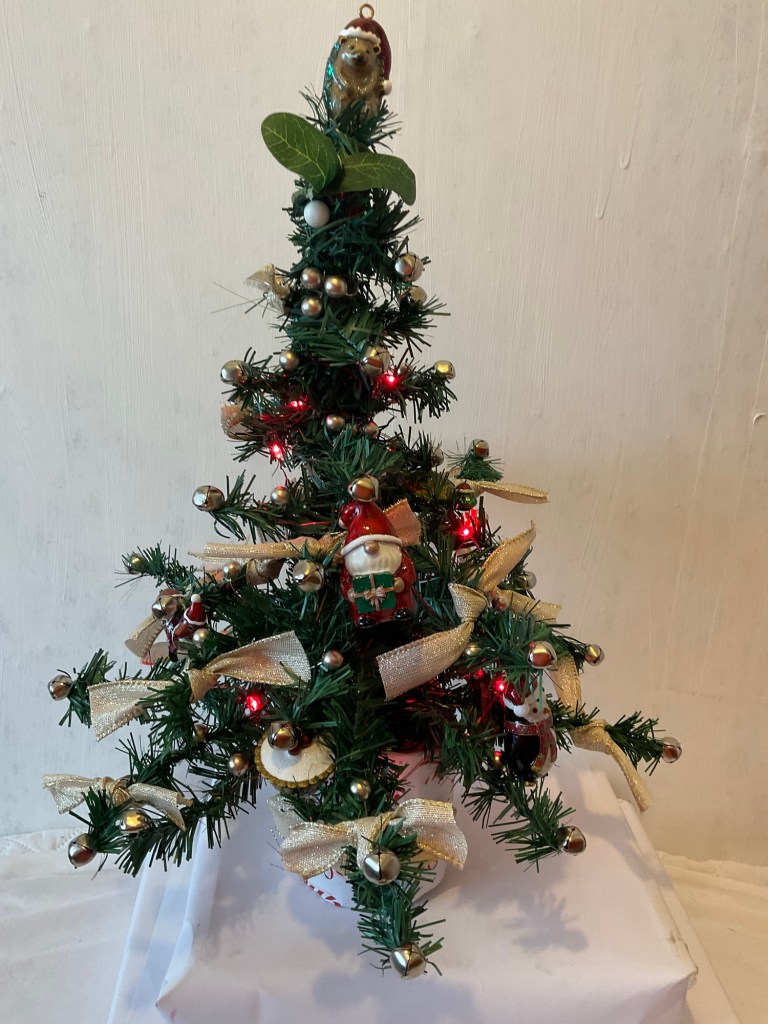
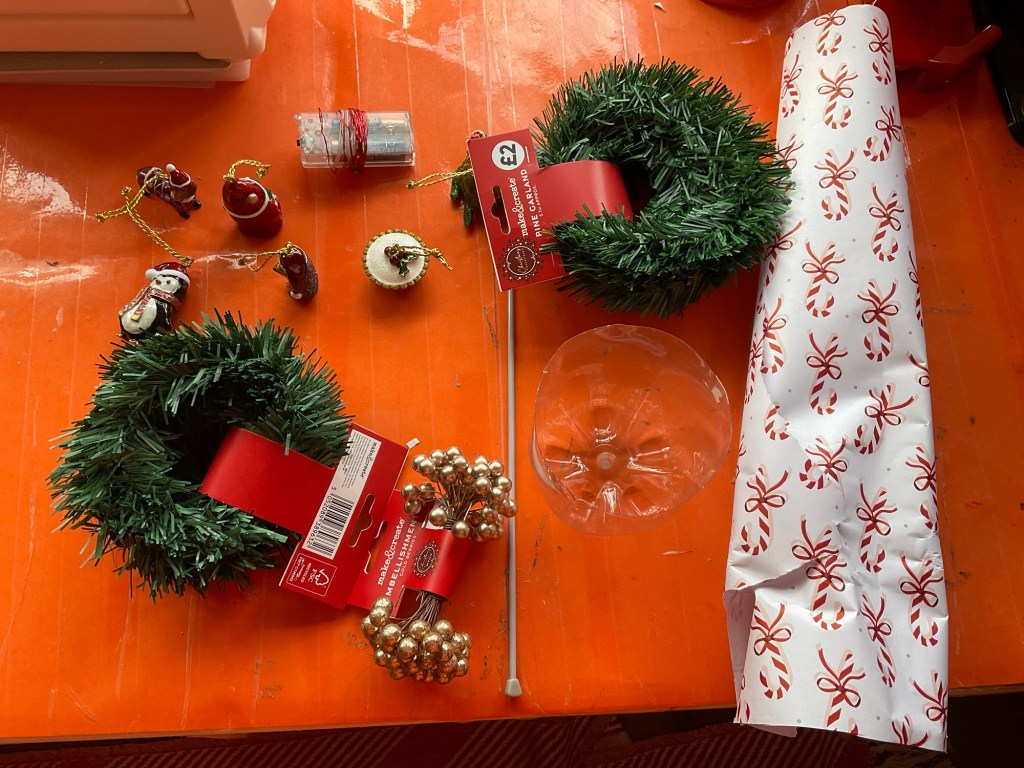
This tree was so much fun to make. I bought the bits to make it from The Works. For the base, I cut down a lemonade bottle and filled it with air dry clay and covered the outside with Christmas wrapping paper. I used an old knitting needle as a support and wrapped the greenery around it. Then I cut the rest of the coils down to different lengths to make the branches and twisted them around the base. I added berries and bows for decoration and a string of battery operated lights. I found some gorgeous tree ornaments in my local Accessorize and added them to the tree. For the hedgehog topper, I made a cone from green card and hot glued him to the top and slid it over the top of the tree. Below is a picture of the elements I used to make the tree before I had assembled them.
This is how my craft table looked before I started to make my tree. A little different from the finished item but it was well worth the effort of making it. The finished tree stands about twenty inches tall and looks great on my work station.
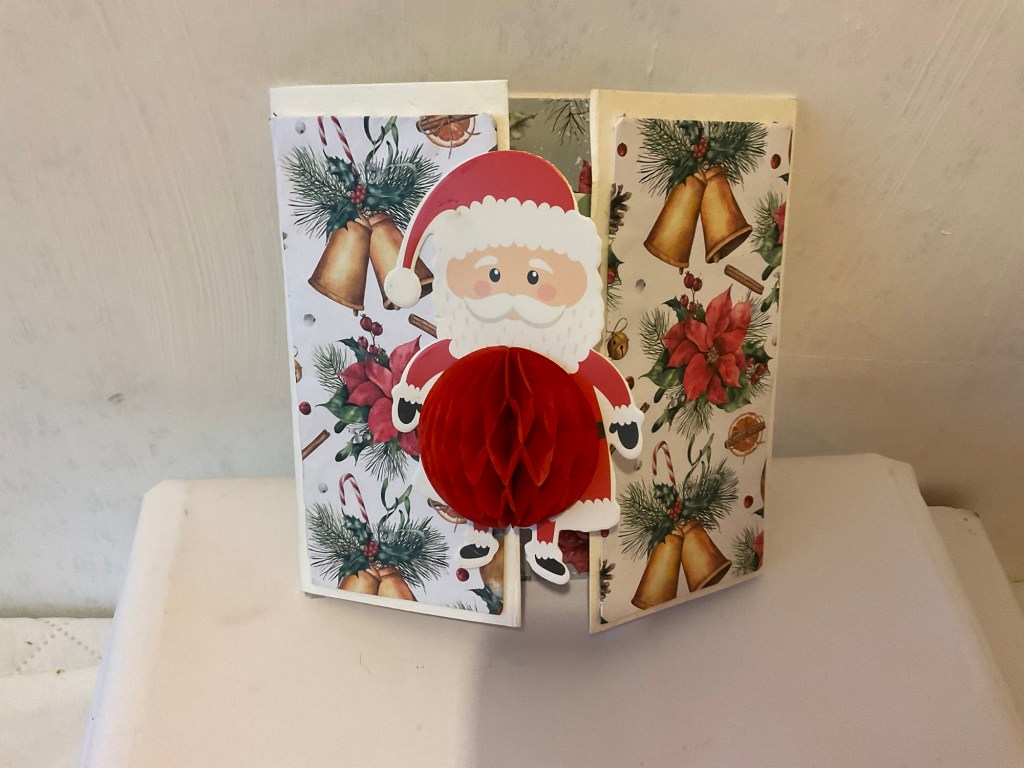
This is my Santa gatefold card. It was made from random items from my Christmas stash draw but it coordinated beautifully. The Santa on the front panel is actually a gift tag, but he is so cute, that I decided to use him as an embellishment.
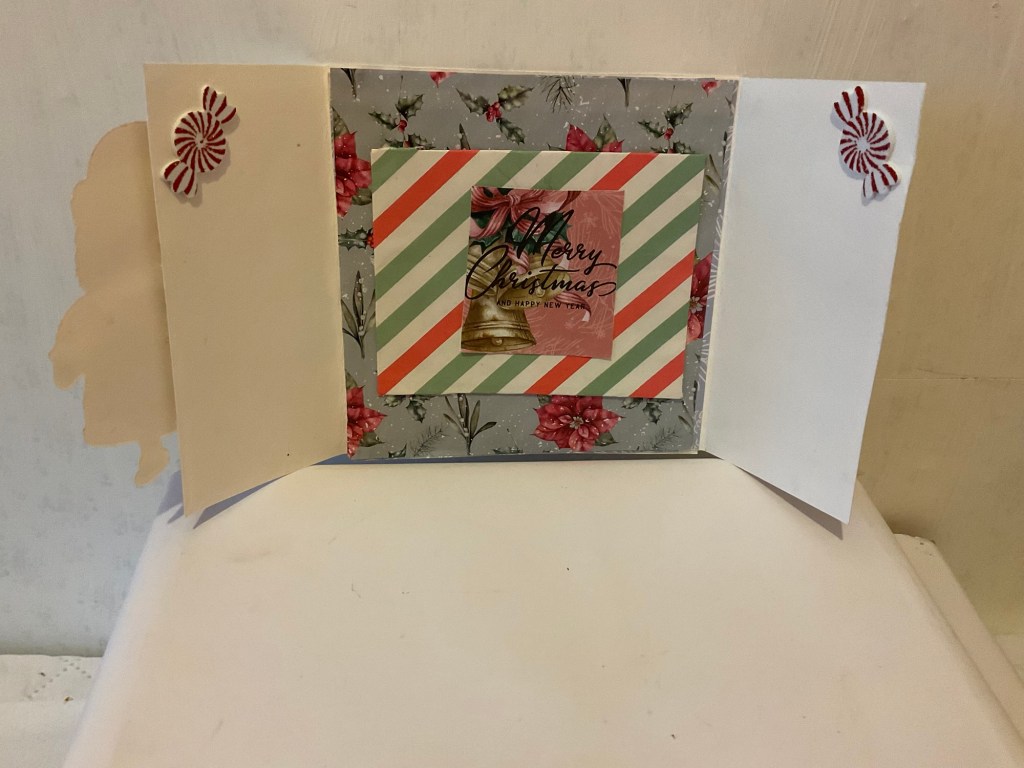
This is what the card looks like on the inside. I used papers from a couple of different packs to make the centre panel and the embellishment. I added a sticker on each inside gatefold for a little extra decoration. There is plenty of space to write a personal message or greeting on these panels.
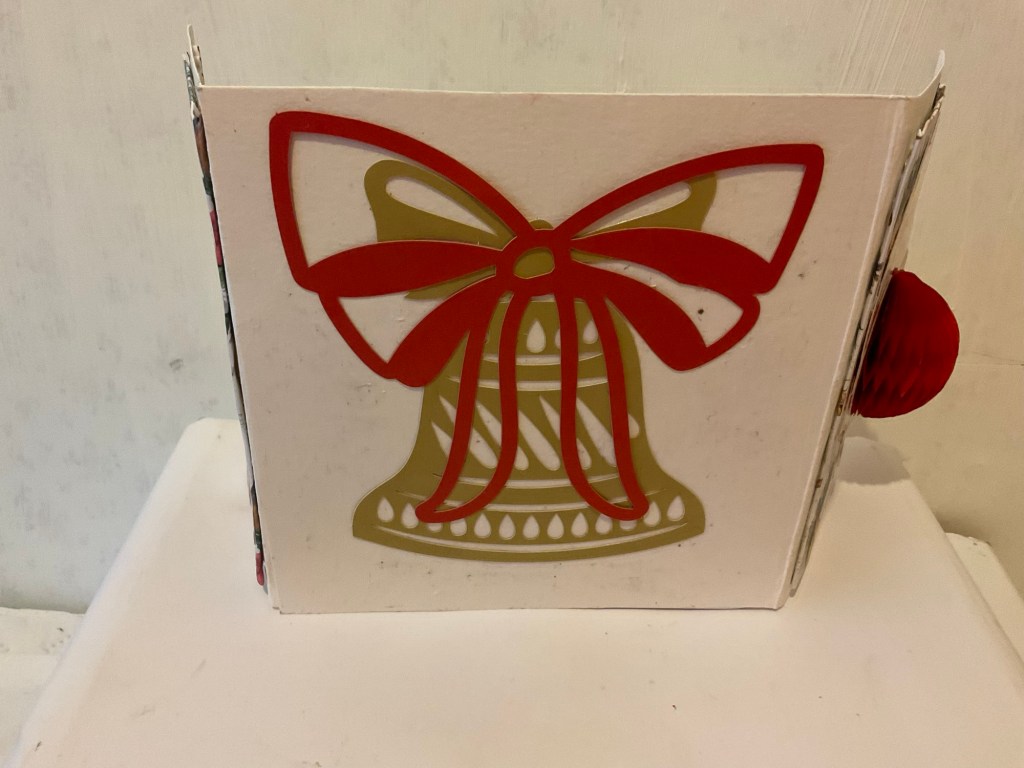
And this is what the back of the card looks like. I used a couple of elements from an embellishment pack to add extra detail. It’s always a good idea to add something on the back of a card. It doesn’t have to be this large, but there’s a chance that the back of the card may be seen by someone, depending on where it is displayed. I always add something on the back of any greeting card that I make.
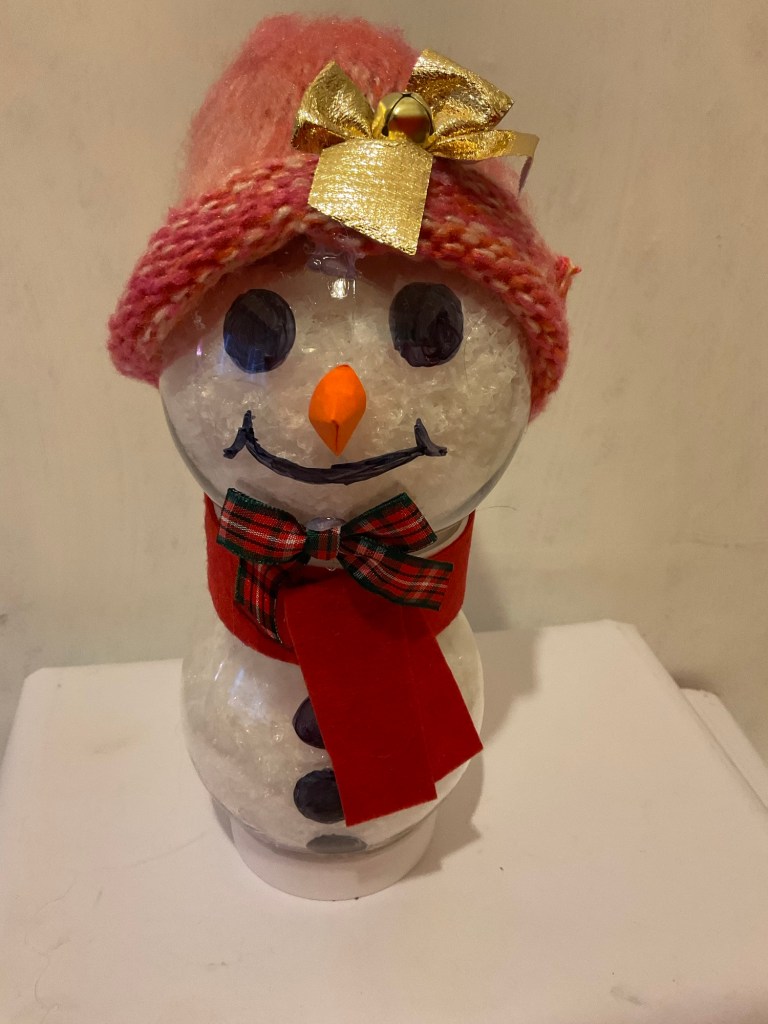
I made this delightful snowman from two snow globes. I filled both with fake snow and hot glued them together. I covered the join with a scarf which I made from felt. The eyes and buttons are drawn on with a black sharpie and the nose was made from a piece of card and glued into place. I made the hat from the toe end of a sock and stuffed the top part. This was glued on with hot glue. I’m really pleased with how he came out and considering other snow globe characters. 🌅
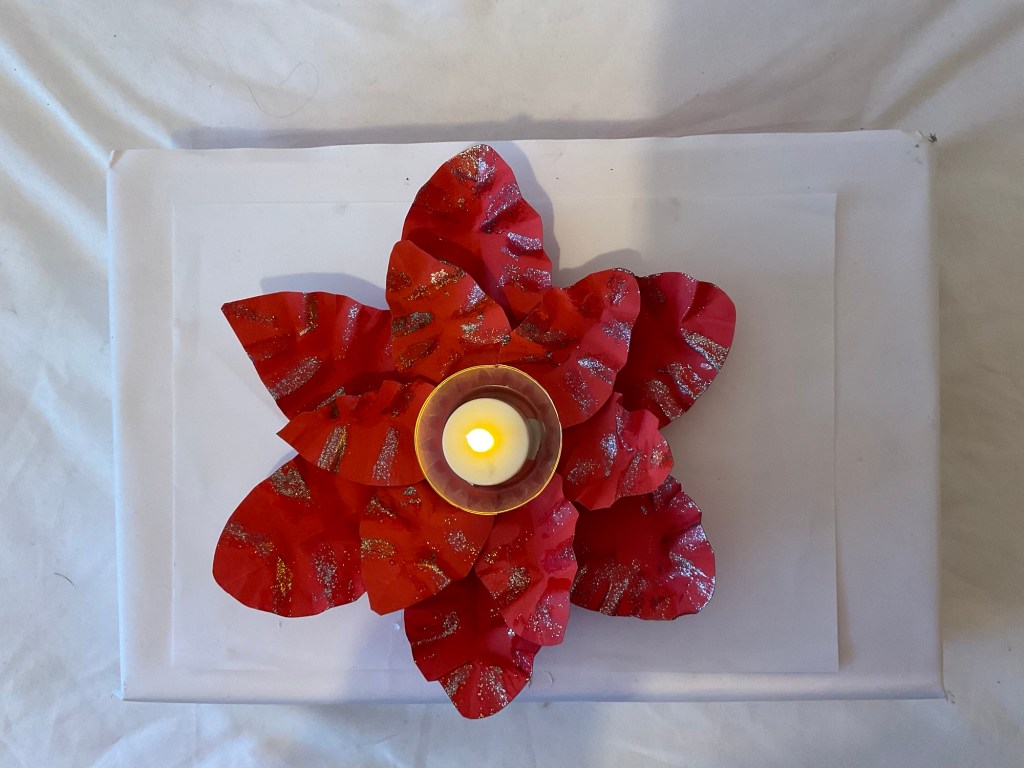
This is my latest Christmas crafting project. It’s made from red card, a cut down plastic tub and a battery candle in the centre. Do have a look at my blog page if you’d like the measurements and details of how to make it. Or if you’d like to see how this is made, please do check out my you tube channel, First Light Crafts.
These are fairly quick and easy to make, so if you sell your products, you could make these to add to your range of products. If you’re doing a craft fair this year, they would look great on your stall.
Have fun with these 🌅

Leave a comment