Hello, I’m Dawn, and I’m delighted to be sharing my creative adventures with you. I have been crafting since I was a child and I decided to turn my passion into a business when I lost my husband in February 2025. I actually started preparing for this adventure in April 2025 and now I’m ready to launch my ideas into the world.
The most frequent question I get asked is how did I come up with the name First Light Crafts for my business. Well, I wanted something that reflected my own name, Dawn. I was going to use the name Sunlight Creations as sunrise is another word for Dawn, but someone beat me to it. Also there is a nursing home quite near to where I live which is called Sunrise, so it could get a bit confusing.
I had to think of another name that had the same meaning. I brainstormed with others and the two main contenders were daybreak crafts and First Light Crafts. I liked First Light the best and so it stuck. Now it’s on all of my paperwork, forms and business cards. My business Facebook page is called First Light Creations, but that’s fine.
My main area of interest is papercrafting. Making notebooks, designer clipboards, bags and boxes, and even some gift ideas such as drinks coasters.
As my website and crafting ideas expand, I’ll be adding new posts to this blog. But in the meantime, I hope you’ve enjoyed getting to know a bit more about me and how my crafting passion started.
Have fun and I’ll catch up with you in the next post. 🌅
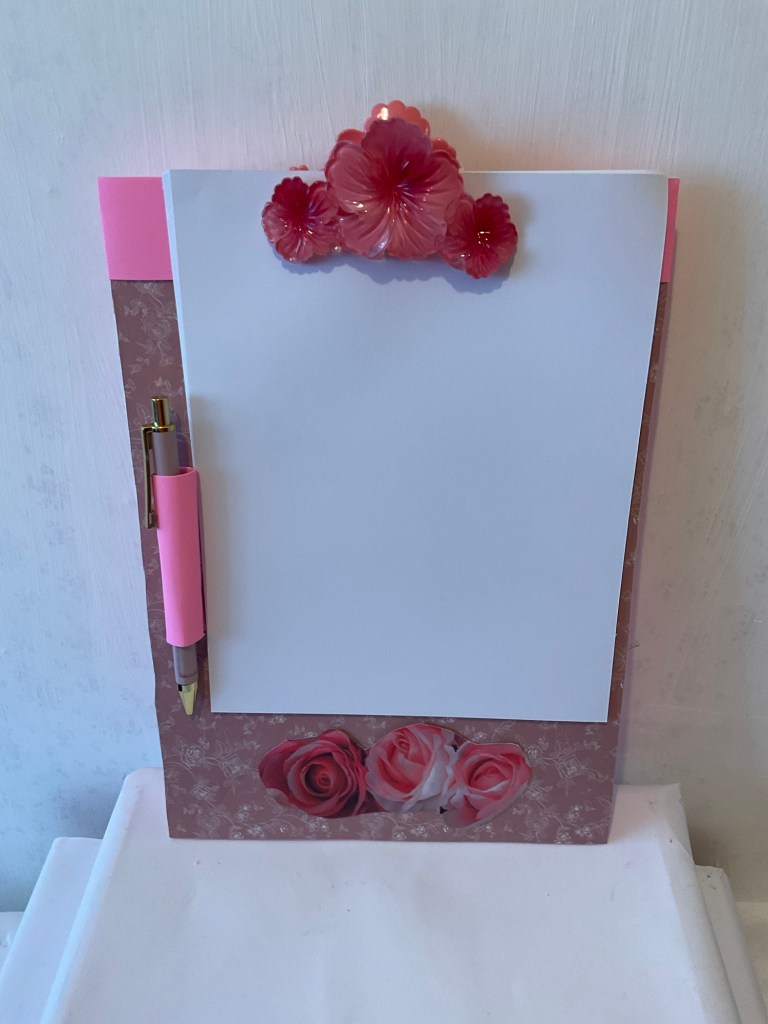
Hi everyone. I have a couple of new items on my site. One of them is this very attractive designer clipboard. I was inspired by the clip that I saw in a local store in town. I thought it was so gorgeous that I had to buy it and make a clipboard with it. I enjoyed finding a paper to match it and I even found a pink pen in my stash. The pen doesn’t come with the board, but the pen loop and paper stock do. This was so much fun to make and very quick and easy.
I also have another new clipboard on my site and that is a monochrome one. That one is an A5, but can easily be made into an A4 size, or even a mini. It’s on the notebooks and clipboards page, so do go and have a look.
The other new product that I have is on the drinks coasters page and it’s a set of four drinks coasters that have a muffin image on them. They were requested for a parry and do look good. So please do go and check them out. Next week, I hope to add a doughnut set of coasters, as this too has been requested.
It’s wonderful getting requests for different items and themes as it helps me to expand my ranges and find new ways of doing things. 🌅
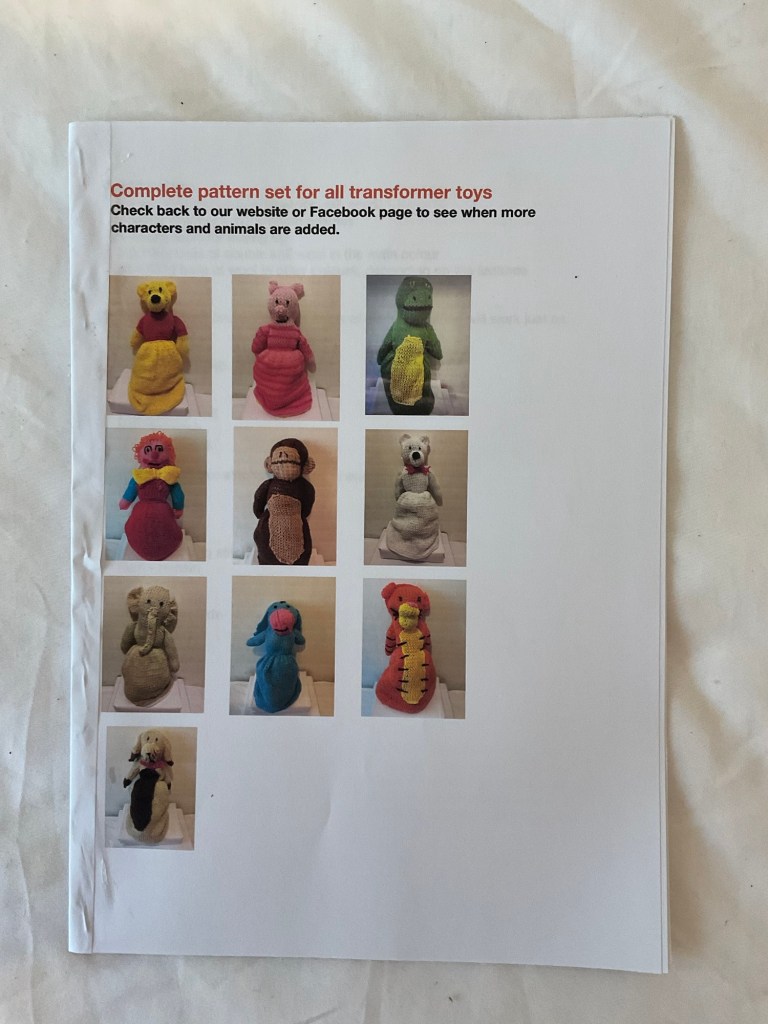
Hi everyone. I have now completed the set of knitting patterns for my transformer toys and it can be found on the transformer toy page. I’ve added the front cover, as you see above plus a page with a section of the pattern on it to give you an idea of what the pattern pages look like.
I’ve also added a new tag to the menu on the homepage and that is gift ideas. At the moment there is only one item, and that is a bag charm that looks like a bag of sweets or candy. These are fun and easy to make, and I’ll be adding more of these, and other gift ideas as they are completed. 🌅
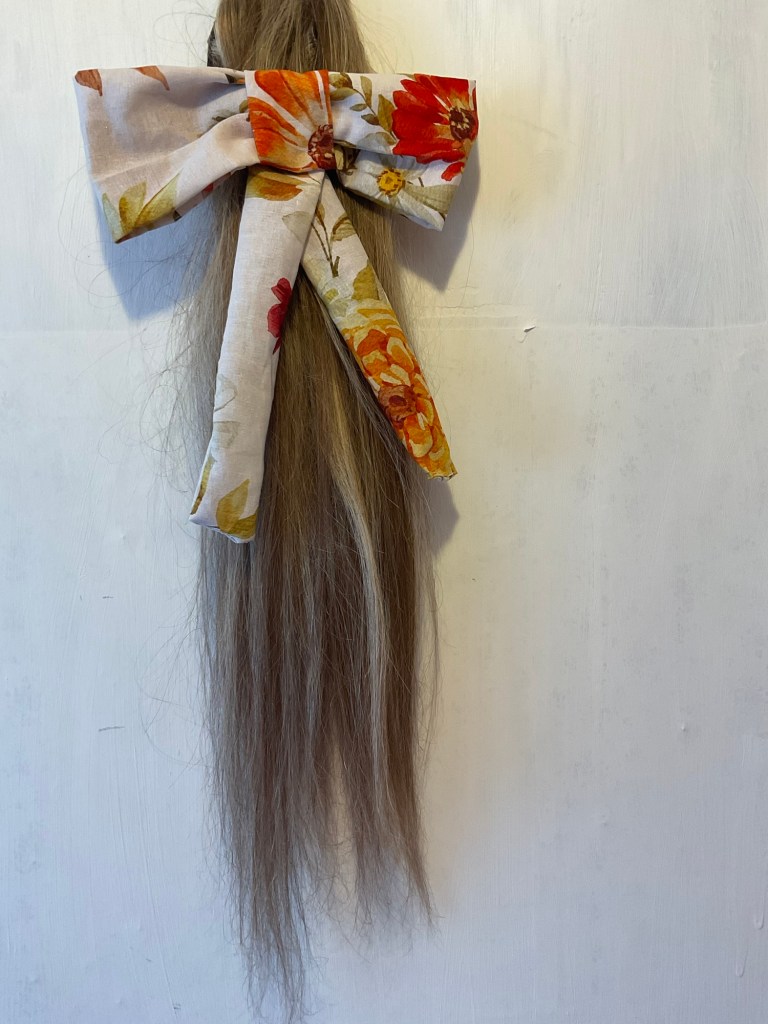
Hi everyone. I have new items on my website now. One of them is the gorgeous bow clip which you can see in the image above. I also have new mirror gift boxes. A brand new scrunchie, and a really cute teddy bag charm. The boxes can be found on the bags and boxes page, and the scrunchie, bow clip and bag charm can be found on the gift ideas page. Do check them out and have a look at my latest products. There will be more as soon as they are completed, including a very cute bag charm in the shape of a gnome. He’s not quite finished yet, but I hope to have him on the site in a day or so. I will, of course, post an update just as soon as he’s there. 🌅
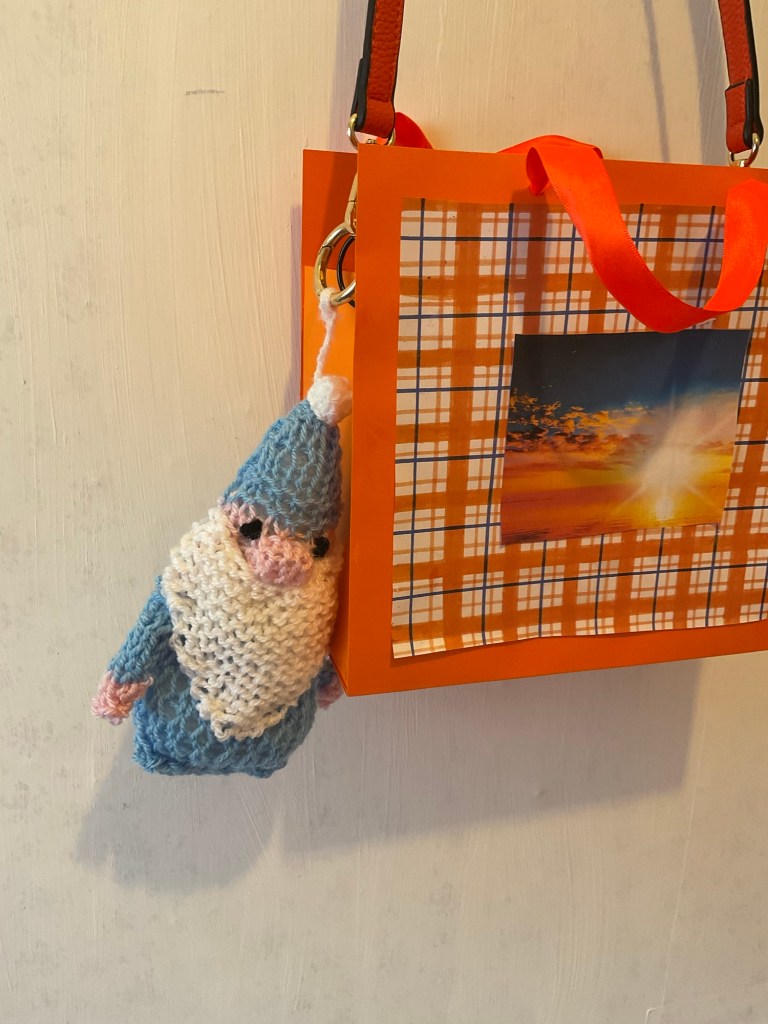
Hi everyone. I’ve updated my site to include my latest items in the gift ideas range of products. This cute gnome charm is one of them. There is a teddy bag charm also available as well as a new series of scrunchies. More will be added as I finish making them, so do check back to see what’s new on my site. If you follow my site, you will be notified when new posts are ready, so if you like what I do, please hit that follow button to stay informed. It’s totally free and makes it easy to keep track of new products. Have fun everyone and until the next update, HAPPY CRAFTING 🌅
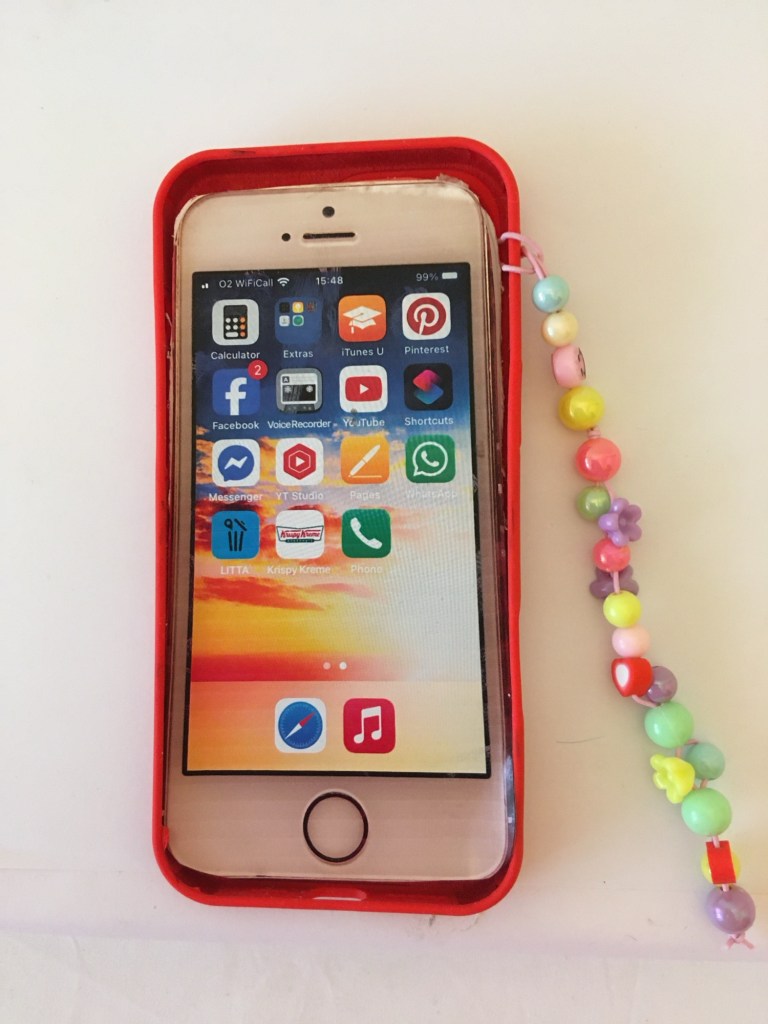
Hi everyone. I’ve added my first phone charm in what will be a new line on my gift ideas page. I’ve made a mock mobile phone to model them. This was just as much fun to make as the phone charm and I’m looking foreword to making more of these charms in different styles. I’m even working on one where there is a mini mobile phone on the end of the charm. I’ll post it and the others on the gift ideas page just as soon as they are ready.
If you make and/or sell phone charms and would like one of these mock phones, please do let he know in the comments and I can make a video to show you how to make your own or tell you how you can purchase one from me. Have fun with your projects and I look forward to catching up with you soon. 🌅
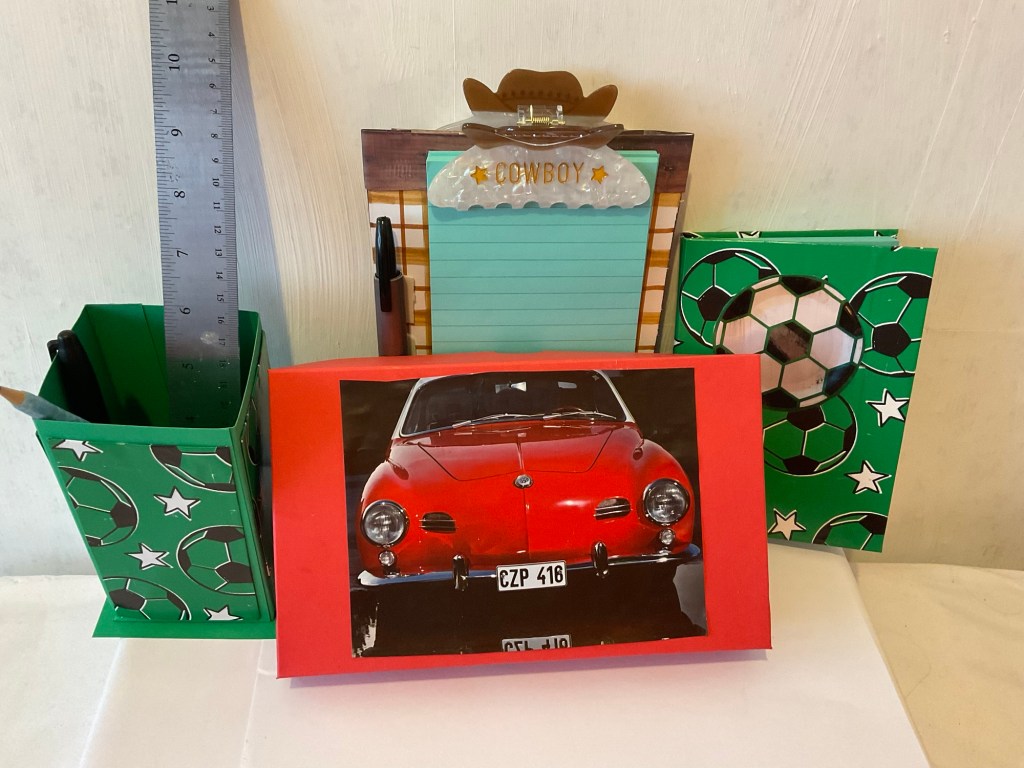
Hi everyone. I’m so excited to tell you about the latest section that I’ve added to my website. It’s calls Gifts for men and as you’ve guessed it comprises of gifts and very soon, greeting cards that are suitable for the men in our lives. I’ve been working on this idea for quite some time and I’m so thrilled to be bringing you the first items in this collection. Check out the tab on the homepage labelled Gifts for Men and see what’s available so far. – I look forward to catching up in the next post. 🌅

TUESDAY 2ND SEPTEMBER 2025 – Hi everyone. I’m delighted to announce that I have three new items posted on my website. One is Rabbit from the Winnie the Pooh characters. You can see him in the picture above. On the flip side is Owl, from the same collection. It seemed appropriate to put these two characters together as in the stories, they think they’re the only ones who know what they are talking about. But of course you can add these to any other character or animal in the range that you like. Both of these can be found in the Transformer Toys page.
The other addition is over on the Christmas Products range and that is a charming Santa Bag charm. Of course he could also be use as a seasonal key ring or even a decoration to be hung around the home. He looks great on the bag to which I’ve attached him, and I plan to make more Christmas bag charms soon. I do hope you enjoy looking at my latest items. 🌅
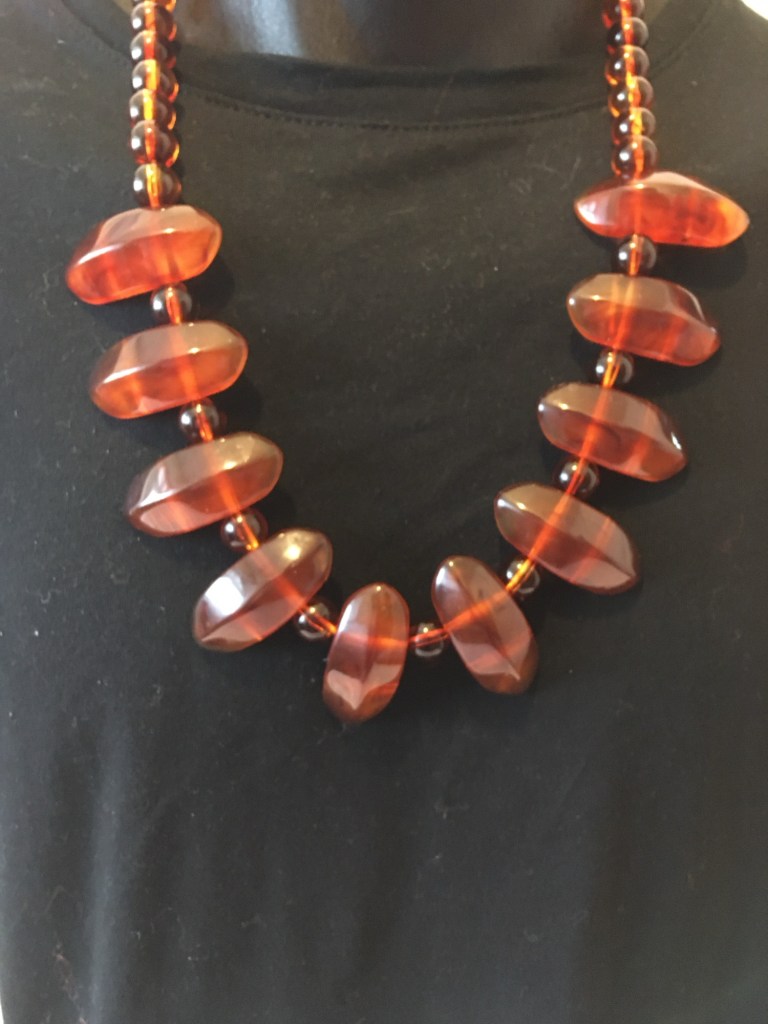
10th September 2025 – Hello everyone. I’ve just hopped on quickly to tell you that I’ve started a new venture in my crafting journey and that is making jewellery. The necklace above is a one off piece that I made and I have a new page on my website with the pieces I’ve made so far. To date, these are one off pieces, but I hope to be able to make other pieces that I can sell in my upcoming shop which I plan to add to my website by the end of September. So watch out for that. I will, of course, add a post when this is up and running and give you a taste of what you can expect to find there. It probably won’t be jewellery just yet, but my transformer toys, designer clipboard and notebooks, as well as other gift ideas. It’s been fun adding this new category to my blog and I hope to add more pieces as soon as my order of jewellery making supplies arrives and I’ve had a chance to play with it. So until the next update, have fun ever time and HAPPY CRAFTING 🌅
15th October 2025
Hi everyone. I’m so excited to tell you that in January of 2026, I will be opening the First Light Business Academy. This isn’t just for craft businesses, it’s for anyone who wants to start their own business but would like some guidance. The programme is spread over five modules and each module lasts four weeks. I’ve kept the pricing reasonable but realistic to cover costs and time.
You’ll learn everything from how to get started in business, advertising and marketing strategies, branding your business to give you a professional identity, the tech, and so much more. The final module is called Fly High, and this is where I teach you how to stand head and shoulders above other businesses and get your offers in front of those who want to buy them.
The programme will be taught inside a private but visible Facebook group so if you are interested in joining me on this journey, please email me at dawnscanlon1@icloud.com and I’ll tell you what you need to do. The doors will open in early December, and if you pay when you sign up, you’ll get an extra bonus. So if you’ve always wanted to start your own business but need some guidance to get started, please do get in touch, and I’ll guide you through every step in a fun and exciting way.
See you there.
25th October 2025
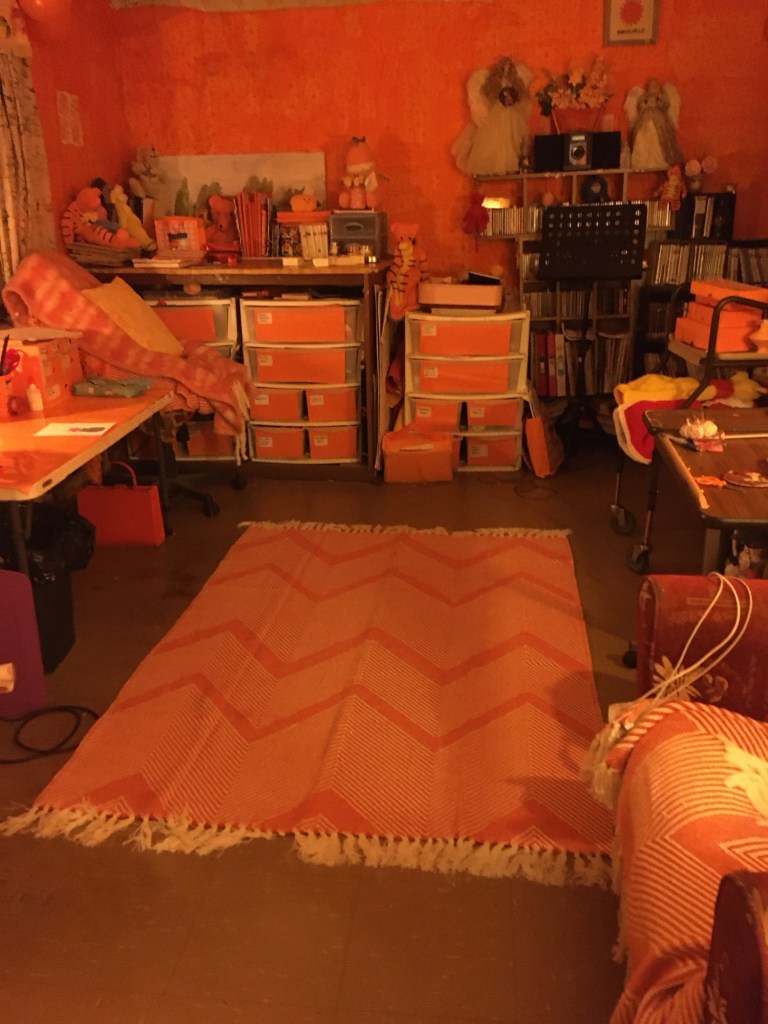
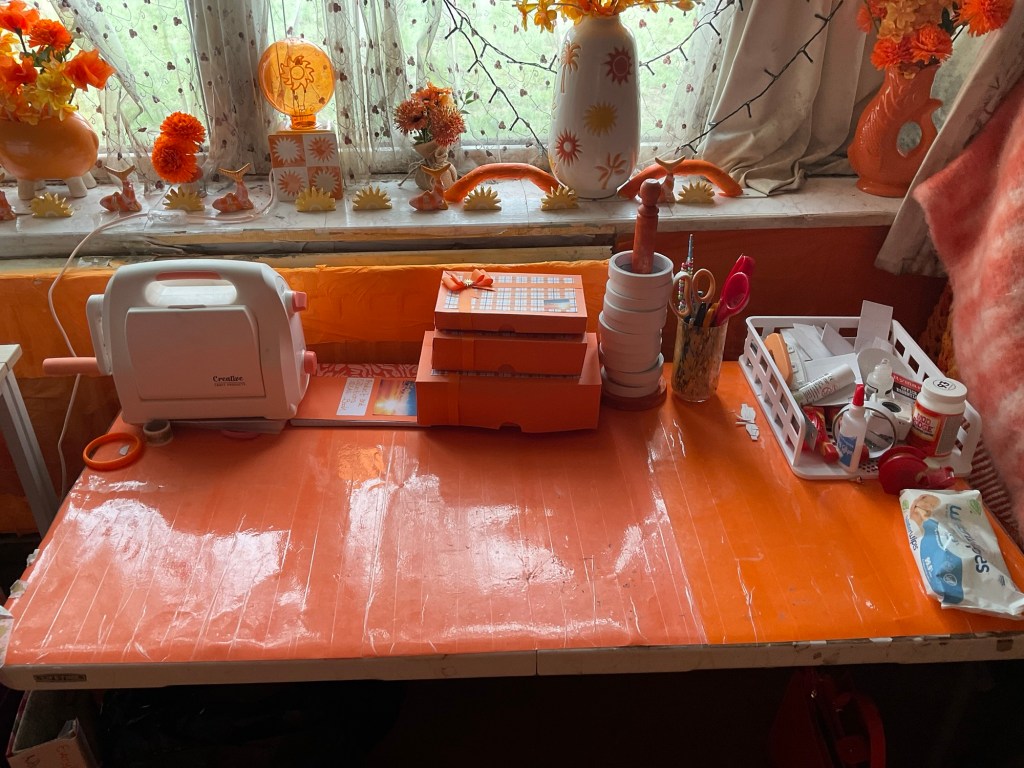
There is a new page added to my website. It’s called, My Orange World.” It shows images of Orange items I have in my workspace and the stories behind them. I hope you’ll pop over and take a look. The picture above is my room at night. Most of lightbulbs in the lamp fittings are orange, so they cast a beautiful soft glow when they are turned on. One of the other items on my new page is my desk, and I’ll pop a photo of that below. Buy do go and see the main page and see my huge orange lamp, as well as other bits and pieces.
Have fun with it.
28th October 2025
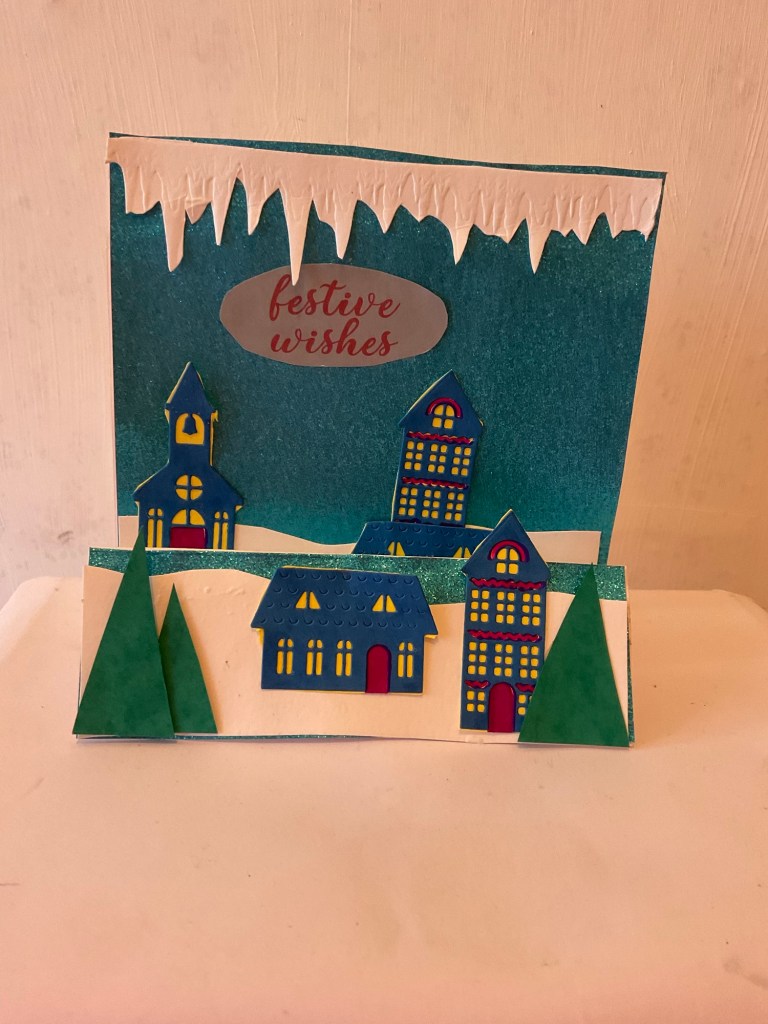
Hi everyone, I thought I’d start adding the projects I make on my you tube channel to this blog. This one went up today and it’s a 6×6 inch stepper card. There are two different ways which you can make the card base, depending on what size card you use.
Method 1 – start with a piece of A3 card and cut a piece that measures 6×16 inches long, and score it at 6, 12 and 14 inches.
Method 2 – cut a piece of 6×12 inches card and score it at 6 inches. Then cut a second piece that measures 6×4.1/2 and score at 4 and 6 inches. Fold the half inch flap back and glue it to the bottom edge of the front of the card.
You will also need 2 matts. One at 6×6 inches and one at 6×2 inches.
You may need to make a stand for this card to stop it falling flat once it’s stood up. To do this you will need a piece of card that measures 6×4 inches and score it every half an inch. 1/2, 1, 1.1/2 and so on up to 3.1/2 inches.
For the decoration, I used an embossing folder for the icicles and the snow drifts, and dies for the buildings. To add lights inside the buildings, I drew around each die cut onto yellow card, cut it out and glued each piece to the backs of the buildings.
If you’d like to watch how I put this card together, please do go over to my First Light Crafts you tube channel and have a look.
I do hope that you enjoy this project and have a go yourself. You can use any embellishments you like to bring your cards to life.
Have fun and………
Happy Crafting 🌅
31st October 2025
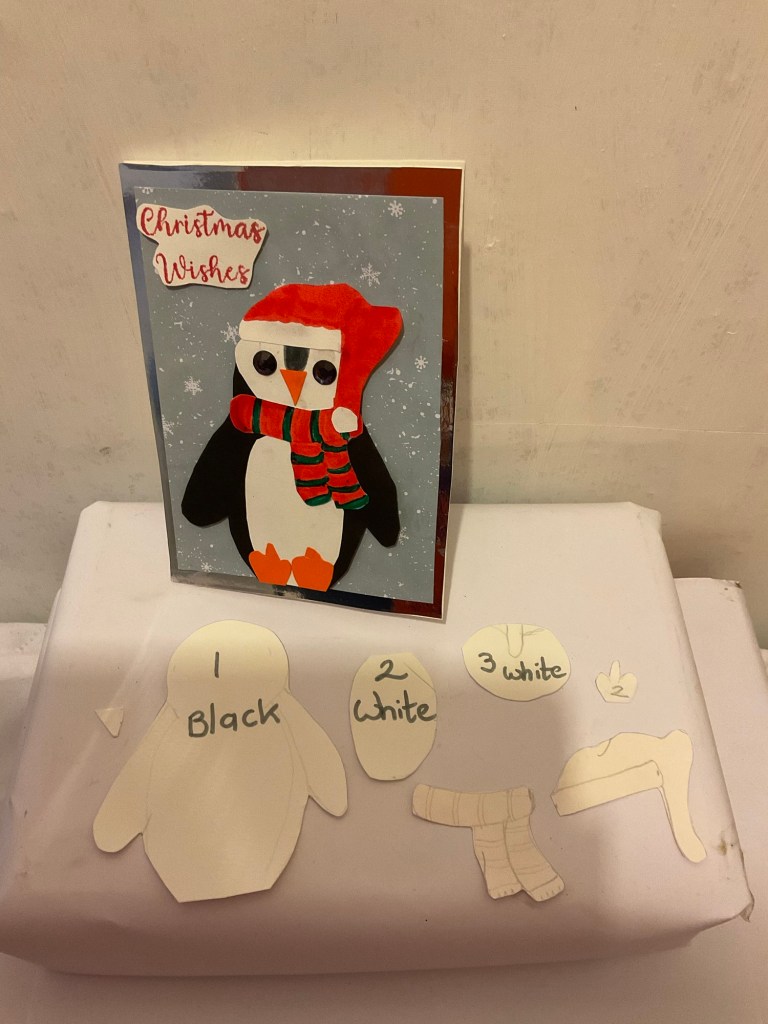
Hi everyone. Today I have a project for you to make for yourself. It’s this really cute penguin card and I’ll leave a picture of the template set so that you can screenshot them, print them off, cut them out and use them to make your own cute penguin. The card and mirror card Matt measure 5×7 inches. The snowflake Matt measures 4.3/4 x 6.3/4 inches. There is a video on my First Light Crafts you tube channel showing you how to make this penguin set up and add it to your card.
The template set is 👇 below, so do grab it and make your own super cute card. If you do, please do come and join our crafty capers with Dawn Facebook group and show us your version. We’d love to see it.
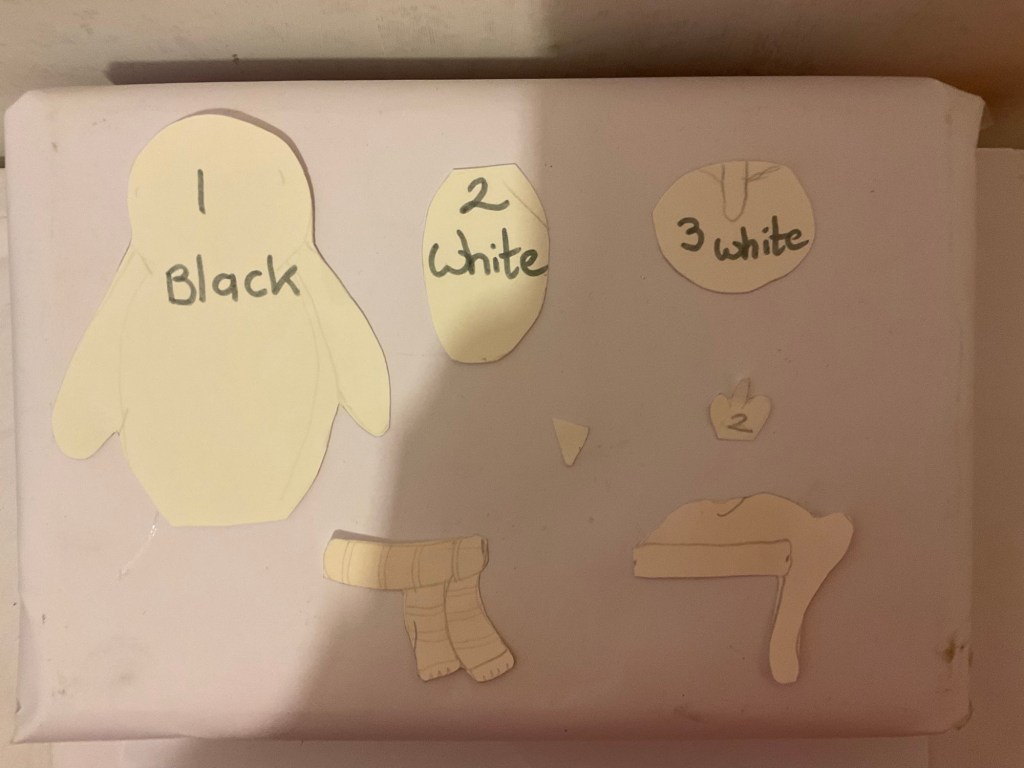
Here is the template set for you to screenshot and use. You can use the pieces at the sizes given here, or you can enlarge or reduce them to fit your project. Have fun with it and I’ll see you next time. 🌅
4th November 2025
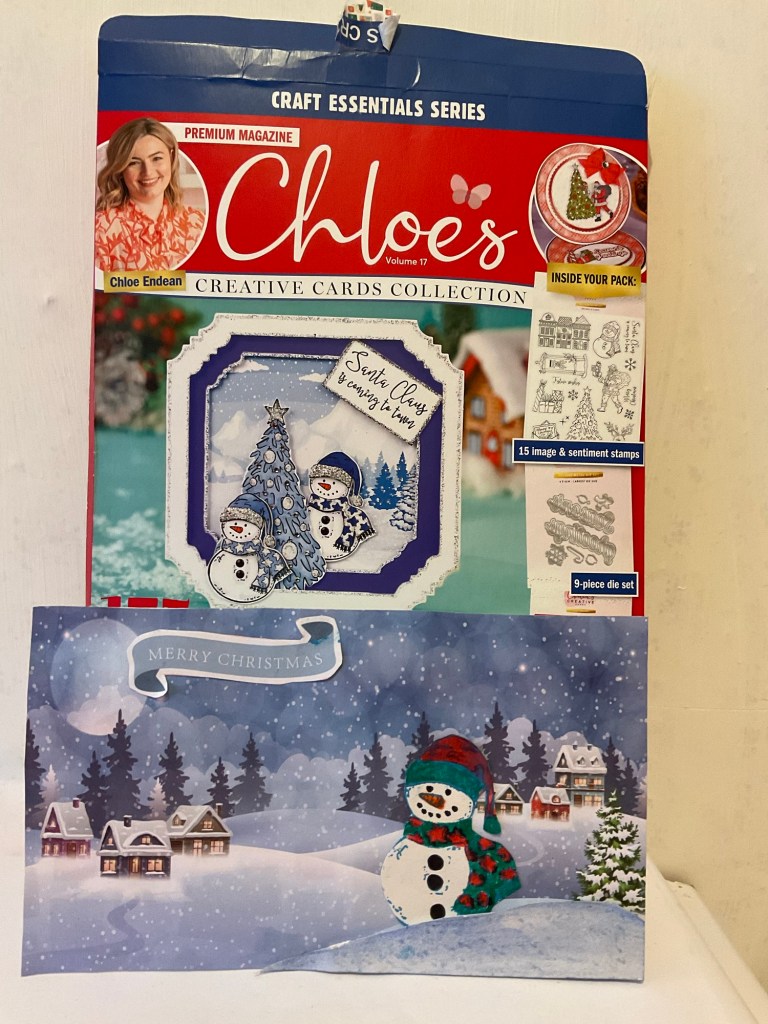
Hi everyone. Today’s project is from box 17 of Chloe’s Creative cards. All of the elements are from the box set. The card and patterned paper measure 8×4.1/2 inches. I made the raised snow hill at the front of the card by drawing a simple shape onto white card, and using watercolours to blend it into the colour scheme of the card. The snowman was part of the stamp set from the kit and I coloured him with alcohol markers. Finally I added a sentiment which was part of the paper pack inside of the magazine. This is a beautiful set and I’ll be doing another project from this kit on Friday, so I hope you can join me for that.
The tutorial for today’s card is on my First Light Crafts you tube channel, so please do feel free to have a look if you’d like to see how I made it.
Well that’s about all for now so until the next time, have fun and……..
HAPPY CRAFTING 🌅
18th November 2025
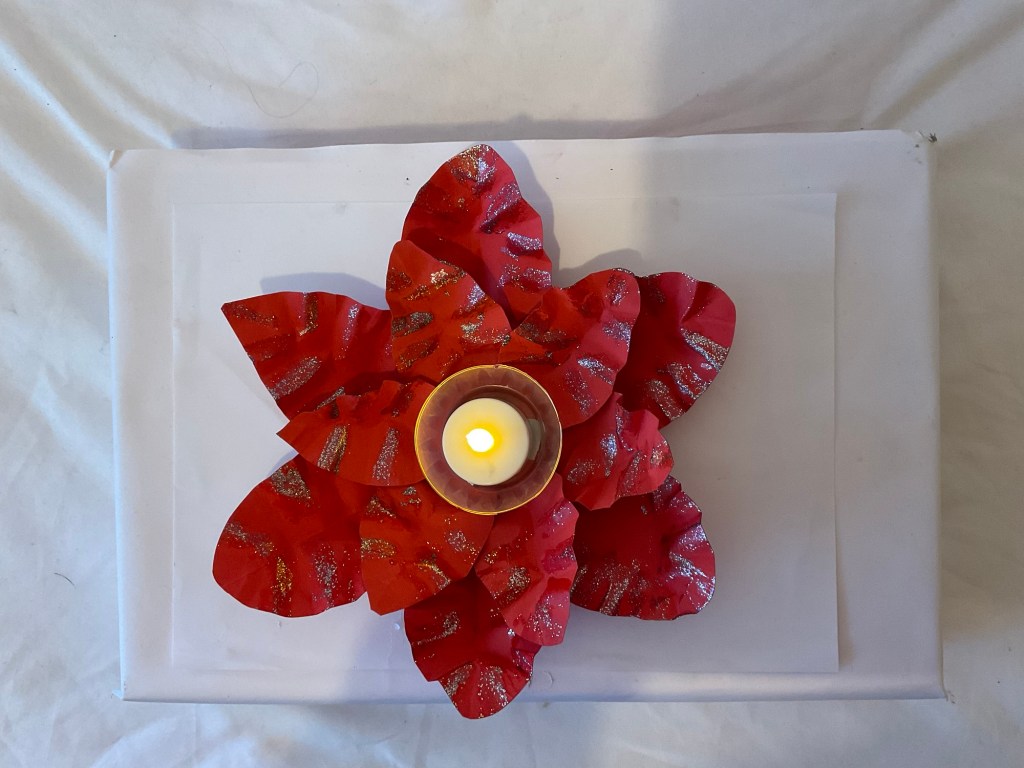
Hi everyone. Today’s project is a Christmas table decoration. It’s easy to make and you don’t need very many supplies. To make this you will need:
Red card, either plain or mirror card.
A round base made from the card that is 3.1/2 inches diameter
6 petals that are 5×2.1/2 inches. Make a template for the shakes and then draw around them onto your card stock and cut them out. When you’ve done that, crease the edges of the petals by scrunching them a little.
6 petals that measure 4×2 inches. (Make template in the same way)
Again crease the edges. Use hot glue to attach the petals to the base, and when you add the smaller petals, attach them so that they are between two of the larger ones, so they are offset.
The tub for the tea light candle is a cut down plastic trifle tub. Make sure you use battery tea lights for this for safety reasons. I attached the plastic tub to the centre of the flower with a strip of foam tape. (Hot glue won’t work for this.)
To add sparkle to my petals, I brushed on a little silver glitter nail polish. You could also use glitter glue or glossy accents if you wish.
Have fun with your decoration if you decide to make one and until next time……….
HAPPY CRAFTING 🌅
5th December 2025
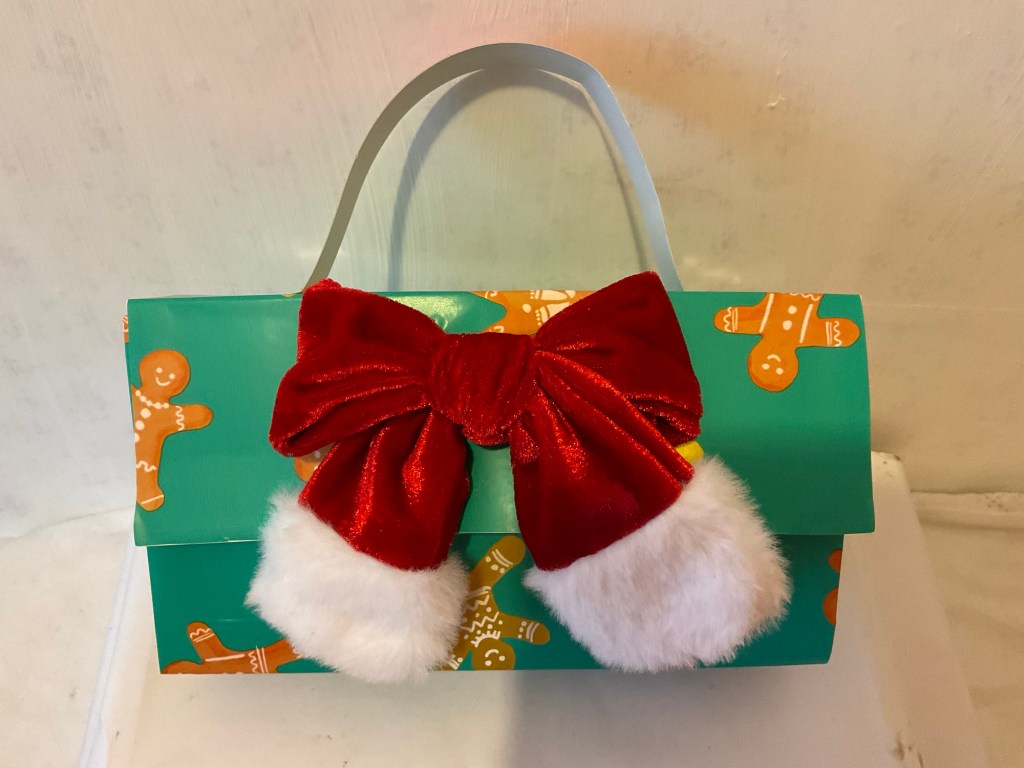
Hi everyone. Today on our you tube channel, we made a wonderful gift bag for Christmas. I used white card and covered it with wrapping paper and added an embellishment for the weighted closure on the lid.
The measurements for our bag are as follows:
Front, base and back are all made from one piece of card that measures 12×8 inches and you score at 4 and 6 inches
2 sides that measure 4×5 inches – score at 2 and 4 on long sides and at 1 inch on one of the short sides.
Lid – 8×6 inches and score at 1 and 3 inches
Handle: coloured card that measures 1×10 inches – score at 1 and 9 inches.
I used a fluffy hair bow clip for the front embellishment, but you can use whatever you like. You can use either a strong double sided tape to assemble your bag, or a craft glue.
Have fun with your gift bag and I’ll see you next time. 🌅
23rd December 2025
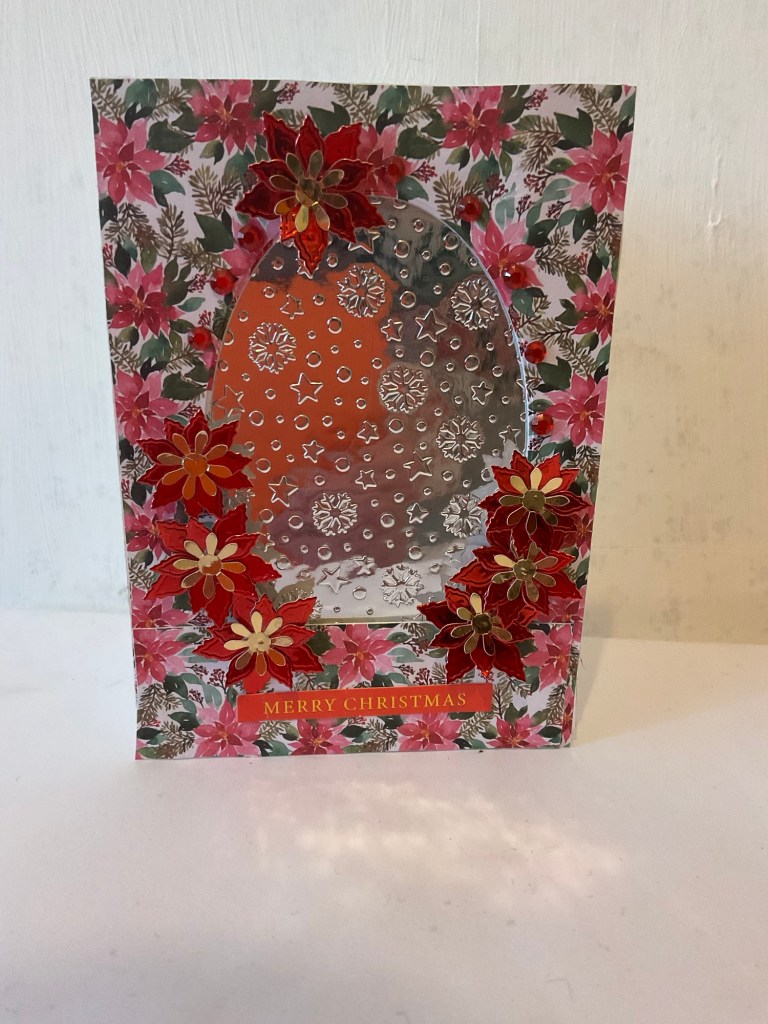
Hi everyone. I have completed my final three projects for this Christmas, and I thought I’d share them with you here and tell you a bit about them. The picture above shows the card I made today, and that is a poinsettia card. It’s a 6×4 card and the inspiration came from the embossing folder. It’s actually a snow image, but if you embossing it onto different coloured card, those snowflakes could easily be interpreted as flowers. I chose poinsettias because I had this beautiful paper in my stash and wanted to use it. I used an oval die that measures 4 x 1.1/2 inches and added a banner that measures 4 x 1.1/2 inches at the bottom. The flowers are made from dies and mirror card to add a bit of shine. I love the way that this card has turned out.
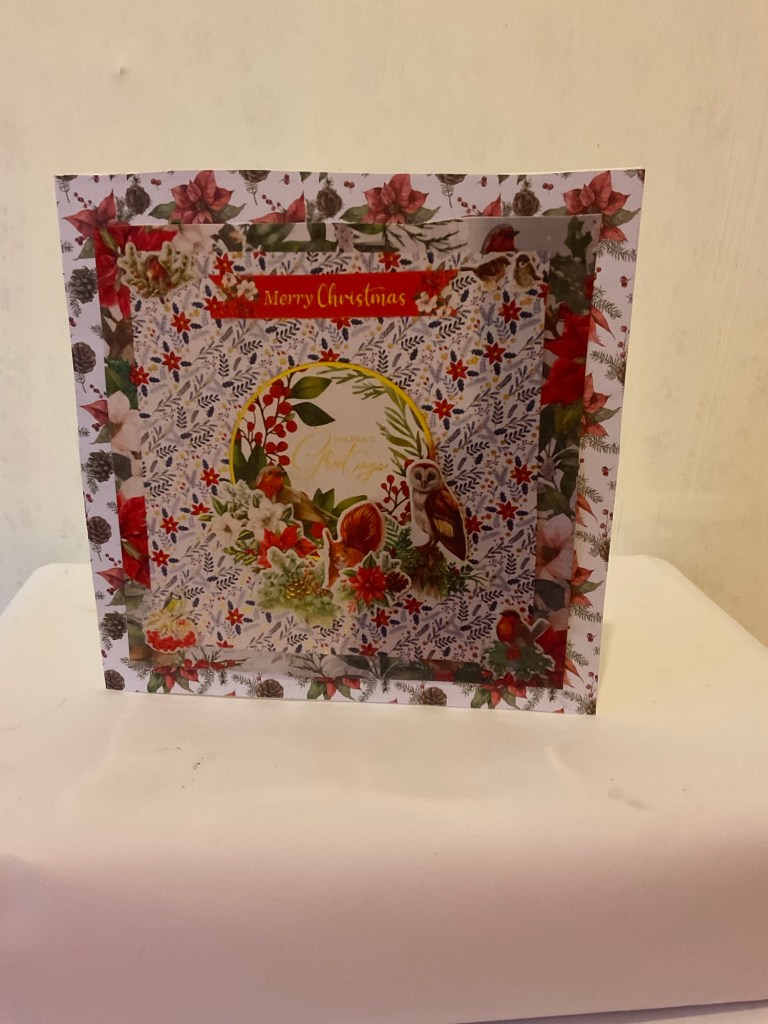
This spring from an idea that I had when I wanted to make batch make a lot of cards with different details and layers, but I didn’t have time to make them all individually. So I took one of my papers. In this case it was an 8×8 inch one. I used other papers and embellishments to work out my design and used a combination of glue and foam pads to add dimension. One the image was finished, I photographed it, resized it according to the cards I wanted to make and printed them out onto glossy photo paper. You can use ordinary card stock to print onto if you wish. Then I simply glued my image to the blank card stock and voila! A batch of detailed cards. The initial design does take a bit of time to make. But once you’ve got it, you can use it as many times as you like. This is a great time saver if you sell your cards.
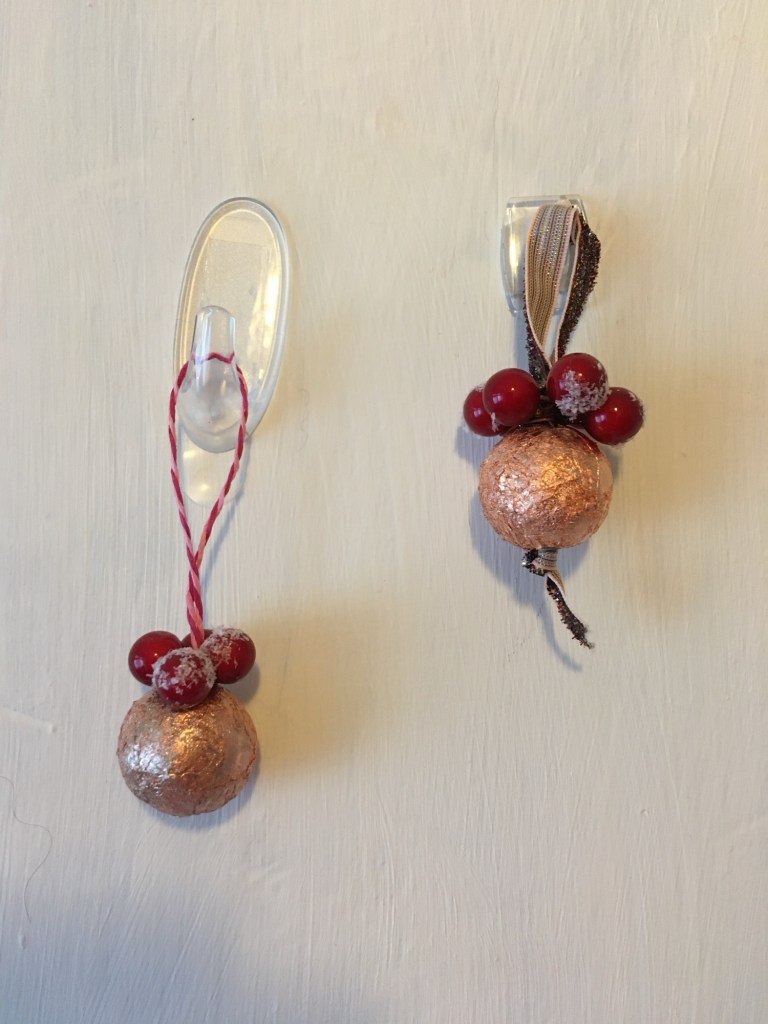
This was a great project to do. A bit messy, but great fun. I took two polystyrene (styrofoam) balls and covered them with double sided tape. Then I rubbed gilding flakes over them to give them shine. I decorated the tops with some supplies that I still had left over and then pushed a length of ribbon for one and twine for the other one so that they can be hung. I am pleased with these three projects and looking forward to more projects in the new year.
So have a wonderful time over the holiday period and I’ll be back in January. 🌅
29th December – 2025
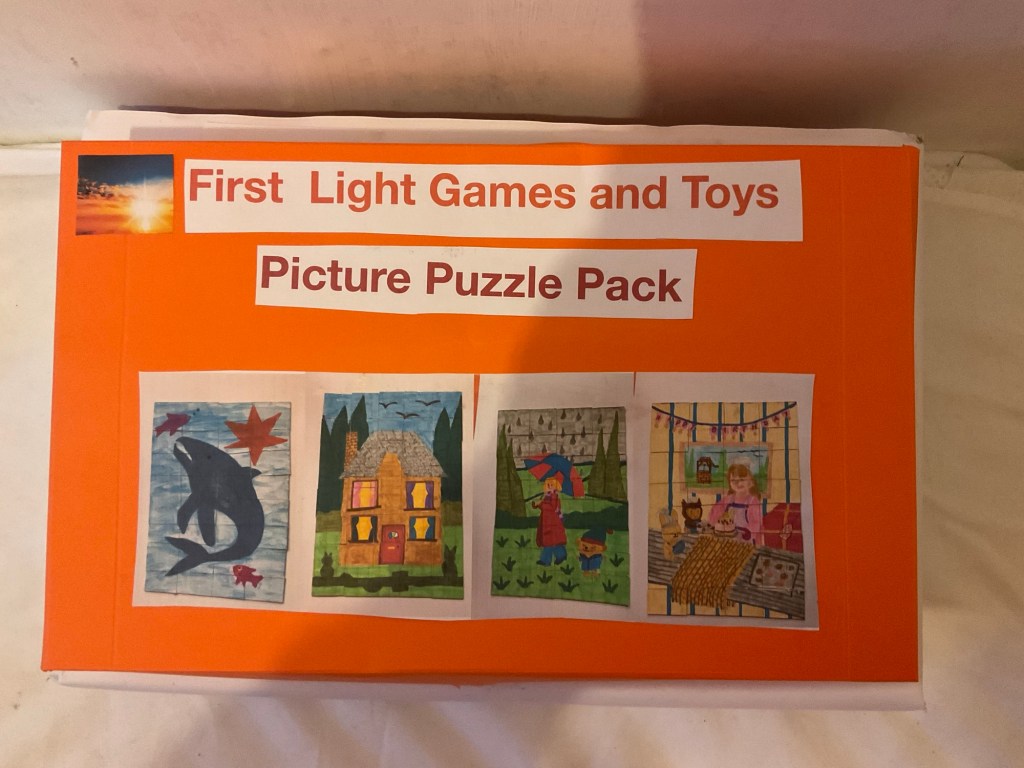
Hi everyone. I hope you’ve had a great Christmas and ready for the new year ahead. I got straight back to work after Christmas and acted on my plan to expand my range of toys and games. This is the first of my new items. It’s a picture puzzle pack made of four different pictures for children between the ages of 5 – 10 to assemble. The number of pieces range from 32 to 40, so it shouldn’t be too difficult, and if you need a little extra help, the pieces are numbered on the back. And yes, I used the numbers when I was putting them together to check that they fitted properly and were all lined up straight. I had so much fun making this puzzle pack, and, of course, the orange box to store it in. I have a list of other new ideas and I’ll be back tomorrow to give you a sneak peek of what’s coming next, although it’s a big project so it might be a while before it’s complete. See you tomorrow. 🌅
30th December 2025
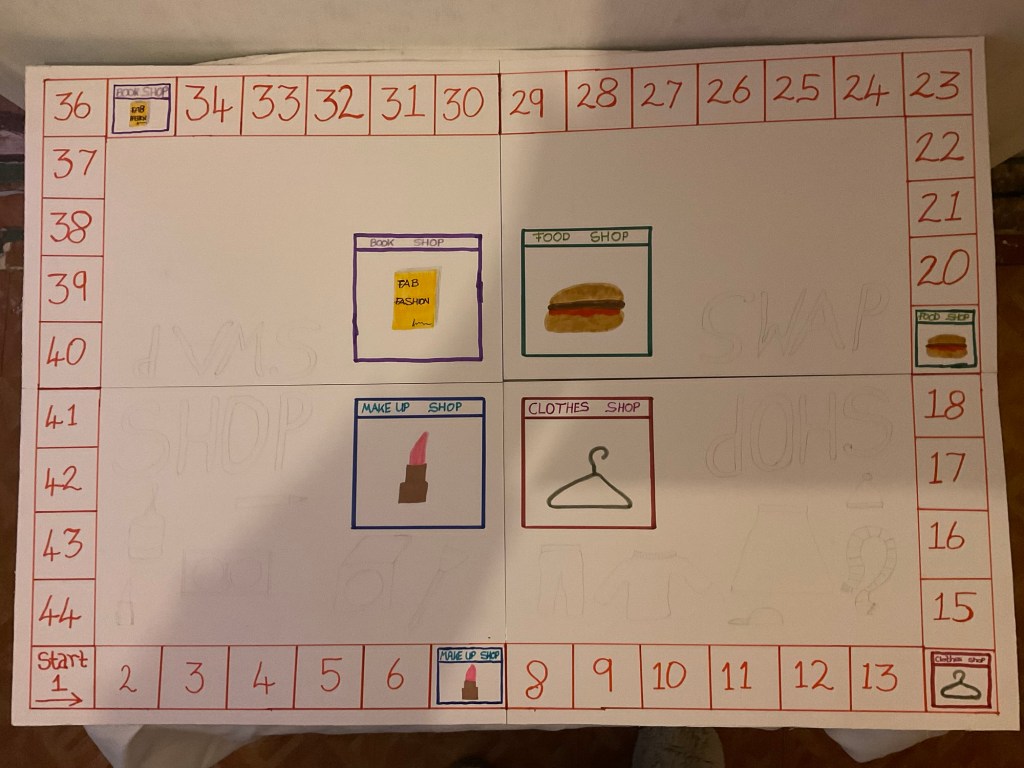
Hi everyone, as promised, I’m giving you a sneak peek of my upcoming new product. It’s a board game based on shopping and it will be called Shop and Swap. The above picture is the unfinished board, but I will be back tomorrow with hopefully a complete board, a couple of other parts to the game and in future posts, maybe a hint of how it’s played. The board was fun but hard work to create. See you tomorrow. 🌅

31st December 2025
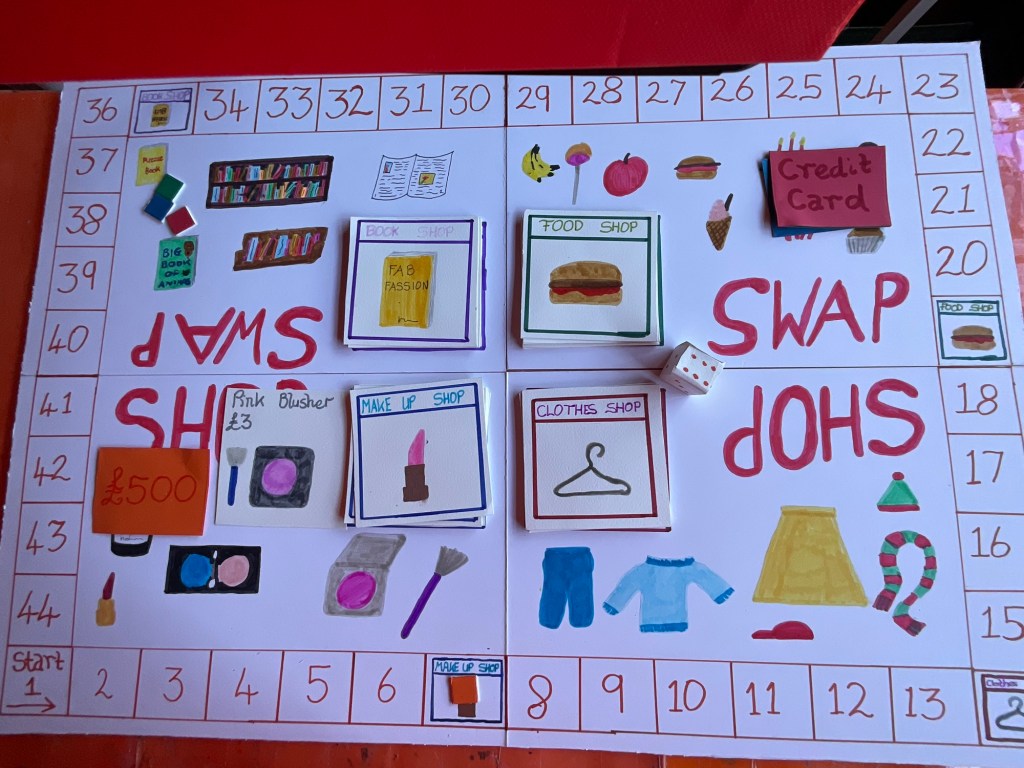
As you can see, my game has moved on quite a bit since yesterday’s post. The game will be called shop and swap, and I love the look of the completed board. I’ve also finished two of the shopping card sets, and I have another two to make up, plus other elements for this game. I hope to be back tomorrow with a further progress report and show you all four completed shopping card sets, plus another crucial element for this game. So do pop back tomorrow and see how this game develops. 🌅
3rd January 2026
Hi everyone, I’m so thrilled to tell you that my board game is now completely finished. It’s called Shop and Swap, and there’s a short video on my First Light Crafts you tube channel to show how it’s played. That was great fun to make. This is the biggest games project I’ve worked on and although it was hard work, it was great fun to design and make. If you would like tutorials on how to devise your own games, please do leave me a comment either here, on my you tube channel or on my First Light Creations Facebook page, and I’d be happy to do them for you. This latest one took quite a while to put together but I’m super happy with the end result. I’ve also made a box to store it in.
So until the next time, have fun everyone, and Happy Crafting 🌅
15th January 2026
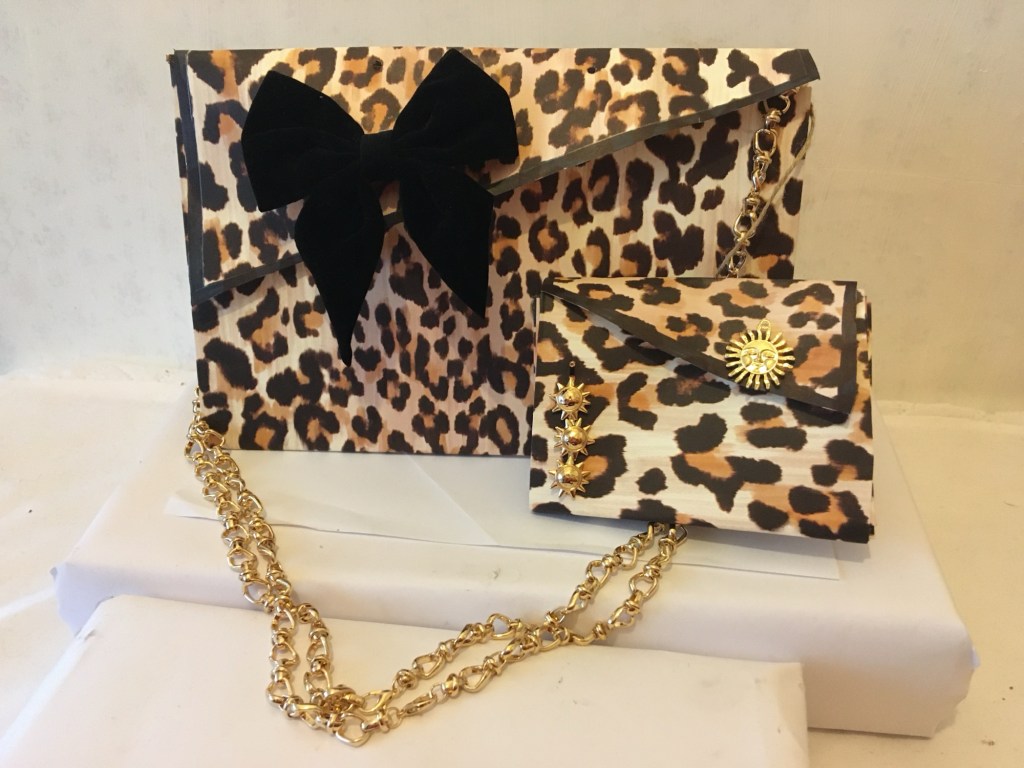
Hi everyone. A client of mine is starting her own paper boutique and she’s commissioned me to make some paper handbags with purses to go inside. This is the first one that I’ve made for her. The bow is a velvet hair clip, and it acts as a weight to keep the flap down, although there is a square of Velcro on the underside to keep it in place. The chain is made from two identical necklaces which I’ve linked together with a jump ring. The three sun embellishment on the purse is a hair slide. I put it there to cover up the holes where the ribbon went through. The original bag was an ordinary paper gift bag which I cut down to make the bag that I wanted for this project. It was fun to make and my client loves it and had asked me to do more in different designs.
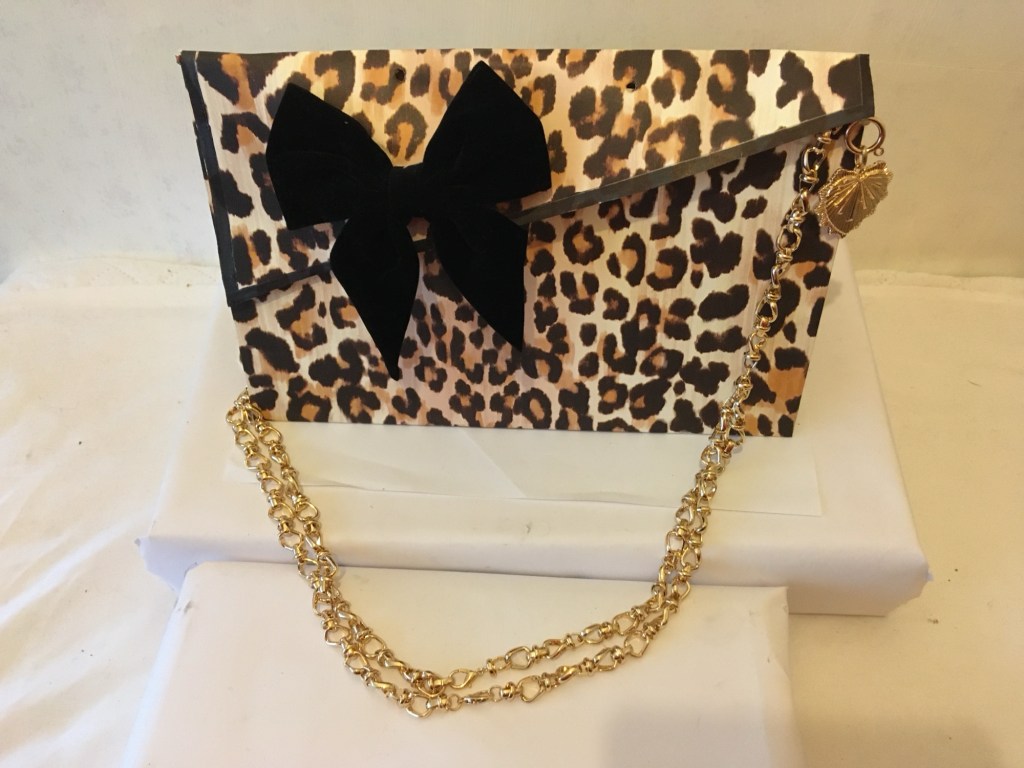
This is just the handbag, without the purse showing. I’ve dropped it inside of the bag. I added a heart charm to the twine when I added the purse. I had so much fun making this, and I’m looking forward to making the next one.
Until the next post, take care and have fun. 🌅
27th January 2026
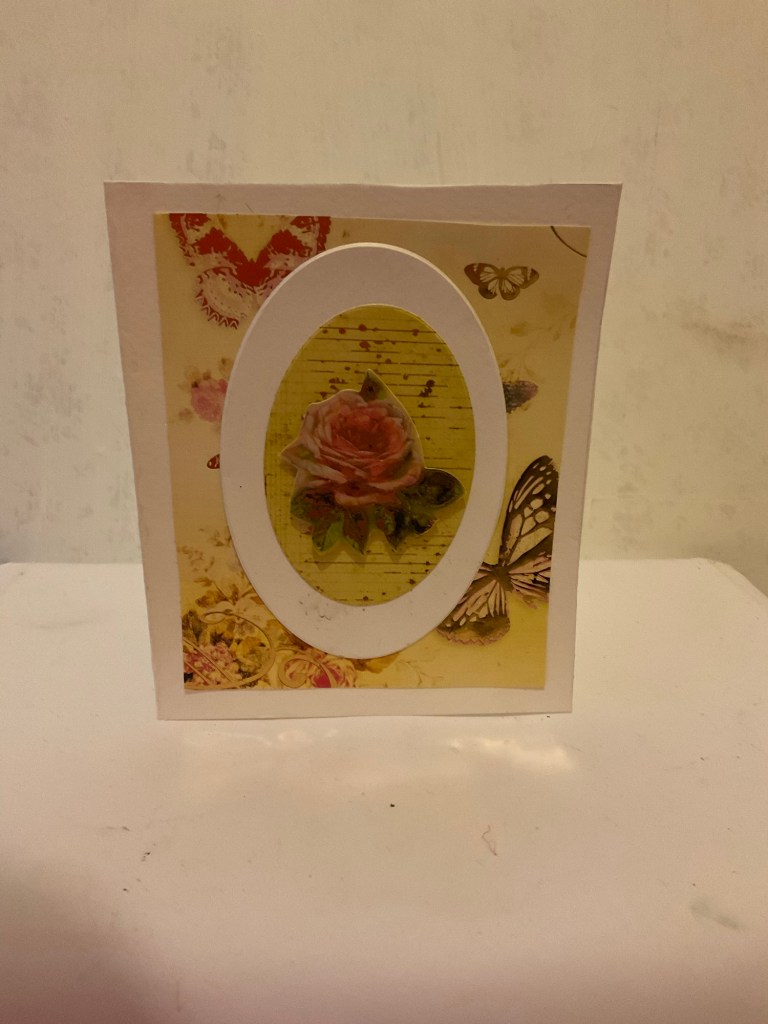
In this project, I made a 6×4 inch greeting card. I made simple layers and the measurements are as follow:
The butterfly Matt measures 4×5 inches. If you’d like the border a little narrower, just cut the Matt a bit bigger. Maybe 4.1/2 by 5.1/2 inches.
The large oval die measures 2.3/4 x 4 inches and the small oval die measures 2 x 3 inches. Again, if you’d like this border to be narrower, cut a slightly bigger oval. Perhaps 2.1/2 x 3.1/2 inches. This type of card can be made in any size and with any combination of shapes and Matt sizes. Raid your dies and papers and see what you come up with.
There is a tutorial for this project over on my First Light Crafts you tube channel if you’d like to see the process in action.
I do hope you have a go yourself. All of the layers were added with a PVA style glue and the rose ephemera was added with a foam pad. 🌅
28th January 2026
In todays post, I’m sharing my homemade bow maker and how easy it is to use. I hope you like it and make one yourself, if you like making bows for your crafting projects. 🌅
27th February 2026
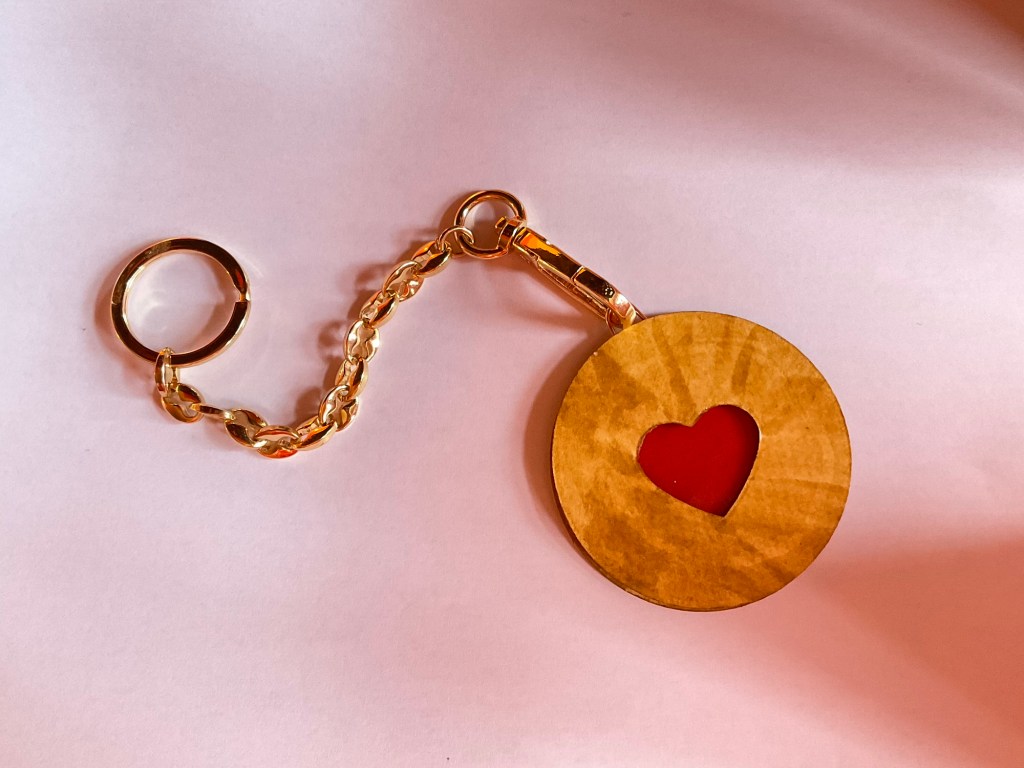
Hi everyone. Today’s project is this cookie bag charm or key ring. You can use it for either purpose. The cookie parts are cut from a circular die, and I used a smaller heart shaped die in the centre of one of them. I cut them from white card and coloured them brown, as I didn’t have any brown card stock. The red in the middle is a piece of scrap red card. I added thin strips of foam pads around the edge and tucked half a paper clip under one of them. This forms the loop to add the chain. I then glued the red card in the centre and placed the circle with the heart in it on top. For the chain, I found an old necklace I’ve never worn and cut it down to shorter lengths. I threaded a key ring circle on one end and clipped a hook on the other end. You can replace the key ring section for another hook if you want to use it as a bag charms. I’m pleased with how this one came out and I’ll be sharing more new projects shortly. 🌅
10th March 2026
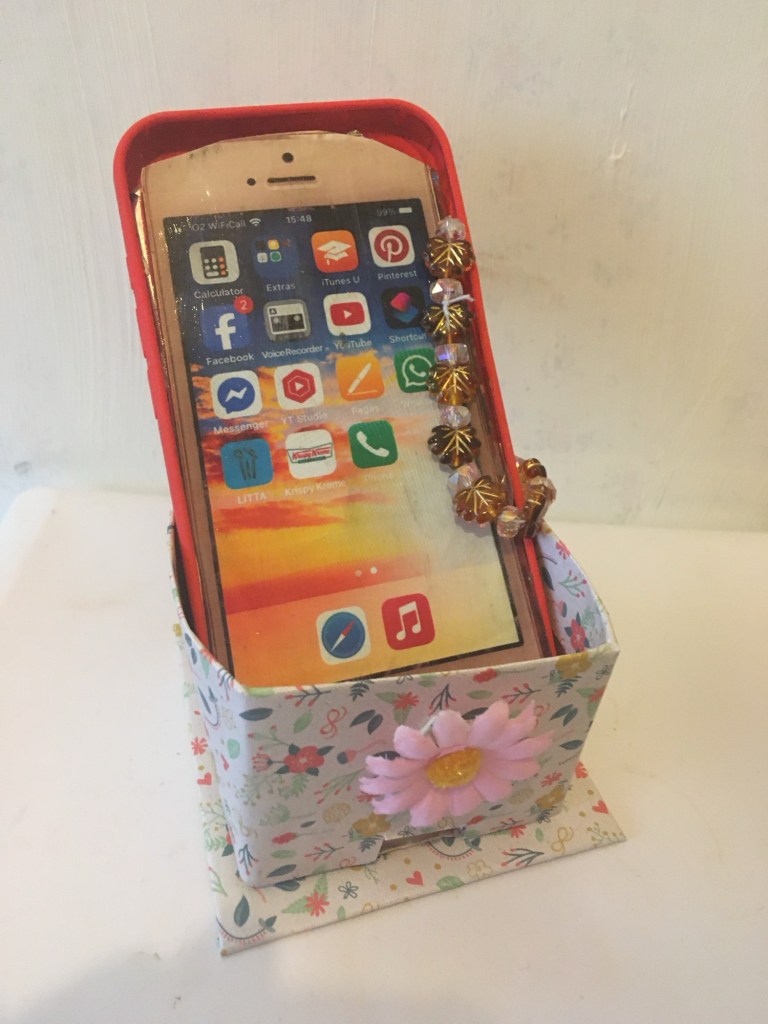
Hi everyone. This is the latest of my craft projects. I cut down an empty milk carton and covered it with patterned paper. I also cut off a scrap of mount board and covered that with the same paper. There is an open space at the bottom so that the phone can be charged while it’s in the holder. These make great items to give as gifts, or if you sell your items, they would make a very popular addition to your collection.
Have fun with your crafting and I’ll catch up with you next time. 🌅

Leave a comment